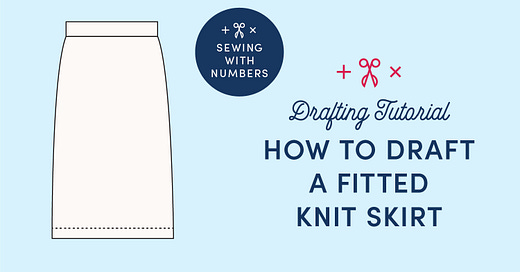
How to Draft a Fitted Knit Skirt
In today's post, we'll draft a knit skirt fitted using negative ease and custom made to your measurements and desires.
It’s time to draft our Fitted Knit Skirt pattern. This is a basic draft with a two-piece waistband (one in front and one in back) and the same pattern piece for the front and back body. In my next posts, I will talk about drafting a separate front and back for curvier bodies as well as how to draft a slit with a mitered hem.
If you haven’t read them already, you can catch up on the previous posts in this series at the links below.
Our approach to today's lesson
Part 1: Select the Negative Ease Multiplier This is based on the stretch percentage of your fabric.
Part 2: Collect information (Write down all the measurements, ease, seam allowance, etc.)
Part 3: Draft the waistband
Part 4: Draft the skirt
Part 5: Recap everything into a handy worksheet
Part 1: Select the Negative Ease Multiplier
In my last post, I went into detail on fabric stretch and ease. I recommend reading it first, if you haven’t already. Or if you want a refresher!
For this drafting project, we need to start by selecting our fabric. If you’re not sure about what fabric you’ll use, or you want to use this pattern for multiple kinds of fabric, then I would draft your pattern for stable knits with 0 ease. Then, if you decide you want more negative ease you can adjust the pattern. Or, you can be tricky and just use a larger seam allowance.
The chart above is based on information from the book Designing and Patternmaking for Stretch Fabrics by Keith Richardson.
Stable Knits (18-25% Stretch) —> Use no multiplier or a multiplier of 1.0.
Moderate Knits (18-25% Stretch) —> Use a multiplier of .98
Stretchy Knits (18-25% Stretch) —> Use a multiplier of .97
Super-Stretchy Knits (18-25% Stretch) —> Use a multiplier of .95
Rib Knits (18-25% Stretch) —> Use a multiplier of .90
When you use the multiplier, it will make the finished measurement SMALLER, meaning there will be NEGATIVE EASE. For example, if I’m using a Stretchy Knit Fabric and my hip measurement is 50”. Then I multiply 50” x .97 = 48.5”. So, the finished garment hip measurement would be 48.5” which is 1.5” of negative ease.
(Note, we are applying the negative ease only to the width, not the length of the garment.)
You may want to use more or less ease, that’s your choice. These are just suggestions. If you want to experiment with different amounts of negative ease, you can make loops of fabric (baste with a narrow zig zag) and try them on.
Final note, a lot of patterns will use the same amount of negative ease across a range of sizes. For example, 2” of negative ease for all sizes. This approach uses an amount of negative ease that is PROPORTIONAL to the body. I don’t think there’s anything wrong with the first approach. (It makes pattern charts much easier to create.) But, it’s a little more fun (and probably more accurate) to draft this way.
Part 2: Collect information
Measuring for this skirt is pretty straightforward. You’ll need to take measurements at the waist, hip and then the vertical distance from waist to hip. If you need help marking these points, you can tie a piece of elastic around the waist and the hip to use as visual guides.
I’ve assigned a representative letter to each number we’ll need. I’ll use these letters in the drafting diagrams and formulas. When drafting your skirt, you’ll replace the letters with your own numbers.
A Waist Circumference Measure the body circumference where you want the waist of the skirt to sit. This may or may not be the “natural” waist.
B Hip Circumference Measure the circumference of the largest part of the hips.
C Waist to Hip Vertical distance from the waist (as determined in measurement A) to the largest part of the hips. This measurement is not taken over the curve of the body. Think of it as measuring that section of your height, perpendicular to the floor.
D Skirt Length Designer's choice!
E Hem Sweep Designer's choice! The hem sweep is the finished circumference of the hem. If you want a straight skirt, you can draw a line straight down from the hip. If you want more of an angle or a fuller skirt, then you might want to estimate the hem sweep. An easy way to do this is with your flexible measuring tape. Make a loop with the tape and put it around your legs and hold it where you want the hem to land and adjust until you find the length you like.
F Negative Ease multiplier See Part 1!
G Elastic Width Usually 1-2” or somewhere in between.
H Elastic Casing Ease I like to have at least 1/8" of ease in the casing. I talk more about it in this post.
I Seam allowance Designer's choice!
J Hem allowance Designer's choice!
Part 3: Draft the waistband
I wrote an entire post about drafting an elastic waistband a few months ago. So, I won’t repeat everything here. Click below to read that post.
This waistband is constructed with one piece of fabric for the front and one for the back with seams at the sides and is folded in half to create a casing for elastic. When drafting we will divide the waist circumference measurement by 2. To draft the waistband, you’ll need numbers A, F, G, H, and I.
This pattern piece is a rectangle. The width of the rectangle will equal the width of the skirt pattern piece and the length of the rectangle is mostly determined by the size of the elastic.
To start, let’s calculate the Width = (A/2)xF + Ix2. In words, you’ll divide the Waist Circumference A by 2 (because this pattern piece is for HALF the body). Then, multiply A/2 by the Negative Ease Multiplier F to create negative ease. Finally, add the Seam Allowance I to each side, which is Ix2.
Next, let’s calculate the Length = (G+H)x2 + Ix2. First, add the Elastic Width G to Elastic Casing Ease H. Then, because the pattern piece is folded, multiply by 2. Finally, add the Seam Allowance I to each side, which is Ix2.
Part 4: Draft the skirt
We are drafting the Front/Back Skirt Body pattern piece to be cut on the fold, so we will divide our body measurements by 4. (I find it efficient to draft just half of the pattern piece because it’s symmetrical and we can be sure that the curve on the left and right will be the same.) To draft the skirt, you’ll need numbers A, B, C, D, E, F, I and J.
You can draft the skirt block in a few ways, I decided the easiest approach is to draft the rectangle to fit the hips, then subtract the shaping for the waist. Let’s get started!
Step 1: Draw a rectangle for the body of the skirt that has a width of (B/4)xF and a length of D Skirt Length. Shown in red in the diagram.
Step 2: Next we’ll add waist shaping by removing a wedge from the top of the side seam. Shown in blue in the diagram.On the top edge, mark a point (A/4)×F away from the right side. Mark a second point on the left side that is Waist to Hip “C” down from the top. Finally, connect the two points witha curved line.
Note: After the garment has been cut and sewn together, the finished measurement of the waist will be AxF and the finished measurement of the hip will be BxF. The pattern is 1/4 the size of the finished garment so those measurements are divided by 4.
STEP 3: If you want to add an A-line shape or a bit of swing to the body of the skirt, now’s the time! For a little bit of A-line shape, you can use Method 1. Draw an angled line from the hip point so that the hem is now equal to 1/4 of the E Hem Sweep. You can also add a little curve to the hem so that the A shape is more gentle at the sides.
If you want a flared skirt, you can slash and spread as shown in the diagram for Method 2. For an even distribution of volume slash the pattern from the hem to the waist. Then pivot each piece evenly from the waist point until the hem equals 1/4 of the E Hem Sweep. Redraw the waist line and hem line.
STEP 4: Add Seam Allowance I to the waist and side seam. Add the Hem Allowance J to the bottom edge. The right hand side is the center front/center back. As drafted, this pattern piece will be cut on folded fabric.
Part 5: Your handy worksheet
Last but not least, I created a printable pdf worksheet that you can use to record your measurements and as a quick reference for drafting this skirt. See preview above. Click below to download it.
I hope that you enjoyed this tutorial! These resources are FREE to use for the time being. I am planning to turn on paid subscriptions for Substack in the future and will likely archive this post. At that time, it will only be available to subscribers. So, make sure to download and save now, if you're interested.
In the next post, I’ll talk about how to draft separate pattern pieces for the front and back. After that, I’ll share how to draft a slit with a mitered facing and (maybe!) my own version of the skirt. I can’t believe how close we are to the end of the year! I’ve been thinking a lot about how often I want to post next year so that it is sustainable for me. (More on that later :)
If you enjoyed this newsletter, you can support it by sharing or clicking the heart at the top or bottom of the post.
Happy mathing!
Beth
You can support this newsletter by subscribing and sharing or check out the links below.
Visit me elsewhere on the web:
Pattern Shop | Improv Quilting E-Course | Instagram | YouTube
Merci pour le partage, c'est très très instructif !!