How to Draft a Shirred Babydoll Dress
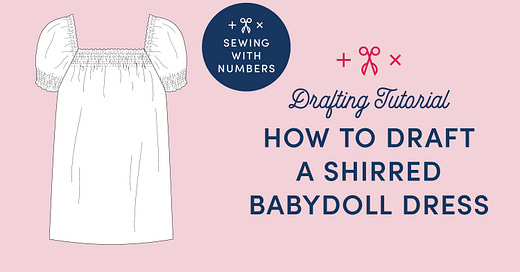
In today's post, we'll draft a custom fitted peasant style dress that's fitted with elastic along the neckline.
Today we're going to dive into drafting the shirred baby doll dress. This tutorial is mostly based on the technique used in How to Make Sewing Patterns by Donald H. McCunn, with additional details and a slight change to the sleeve draft. Let's get started!
In the intro post for this project, I shared details on the inspiration for this design and links to related tutorials. If you missed it, you can click below to read that post.
Our approach to today's lesson
I've broken down the process into five sections.
Part 1: Determine elastic design and facing depth
Part 2: Collect information (Write down all the measurements, ease, seam allowance, etc.)
Part 3: Draft the bodice
Part 4: Draft the sleeve
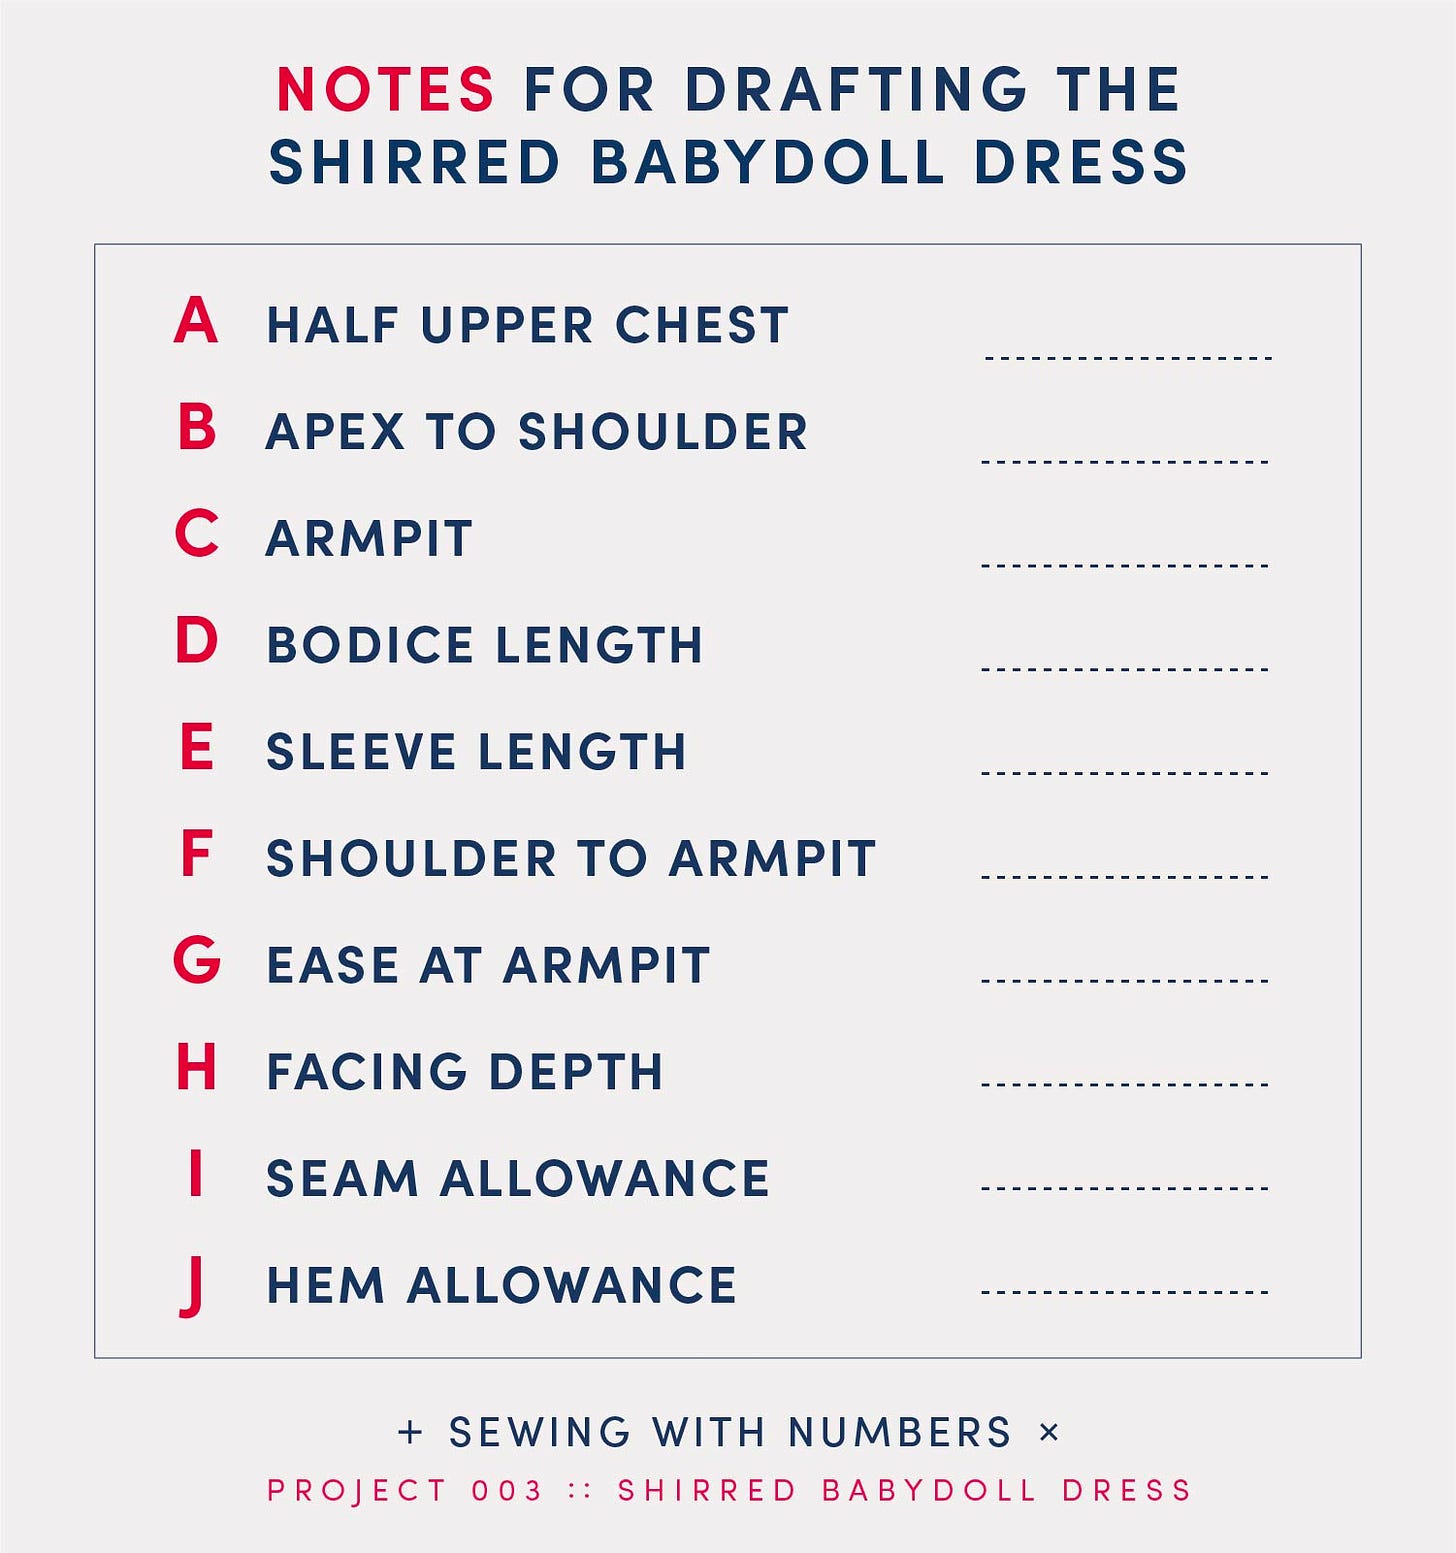
Part 5: Recap everything into a handy worksheet
Part 1: Determine elastic and shirring design and facing depth
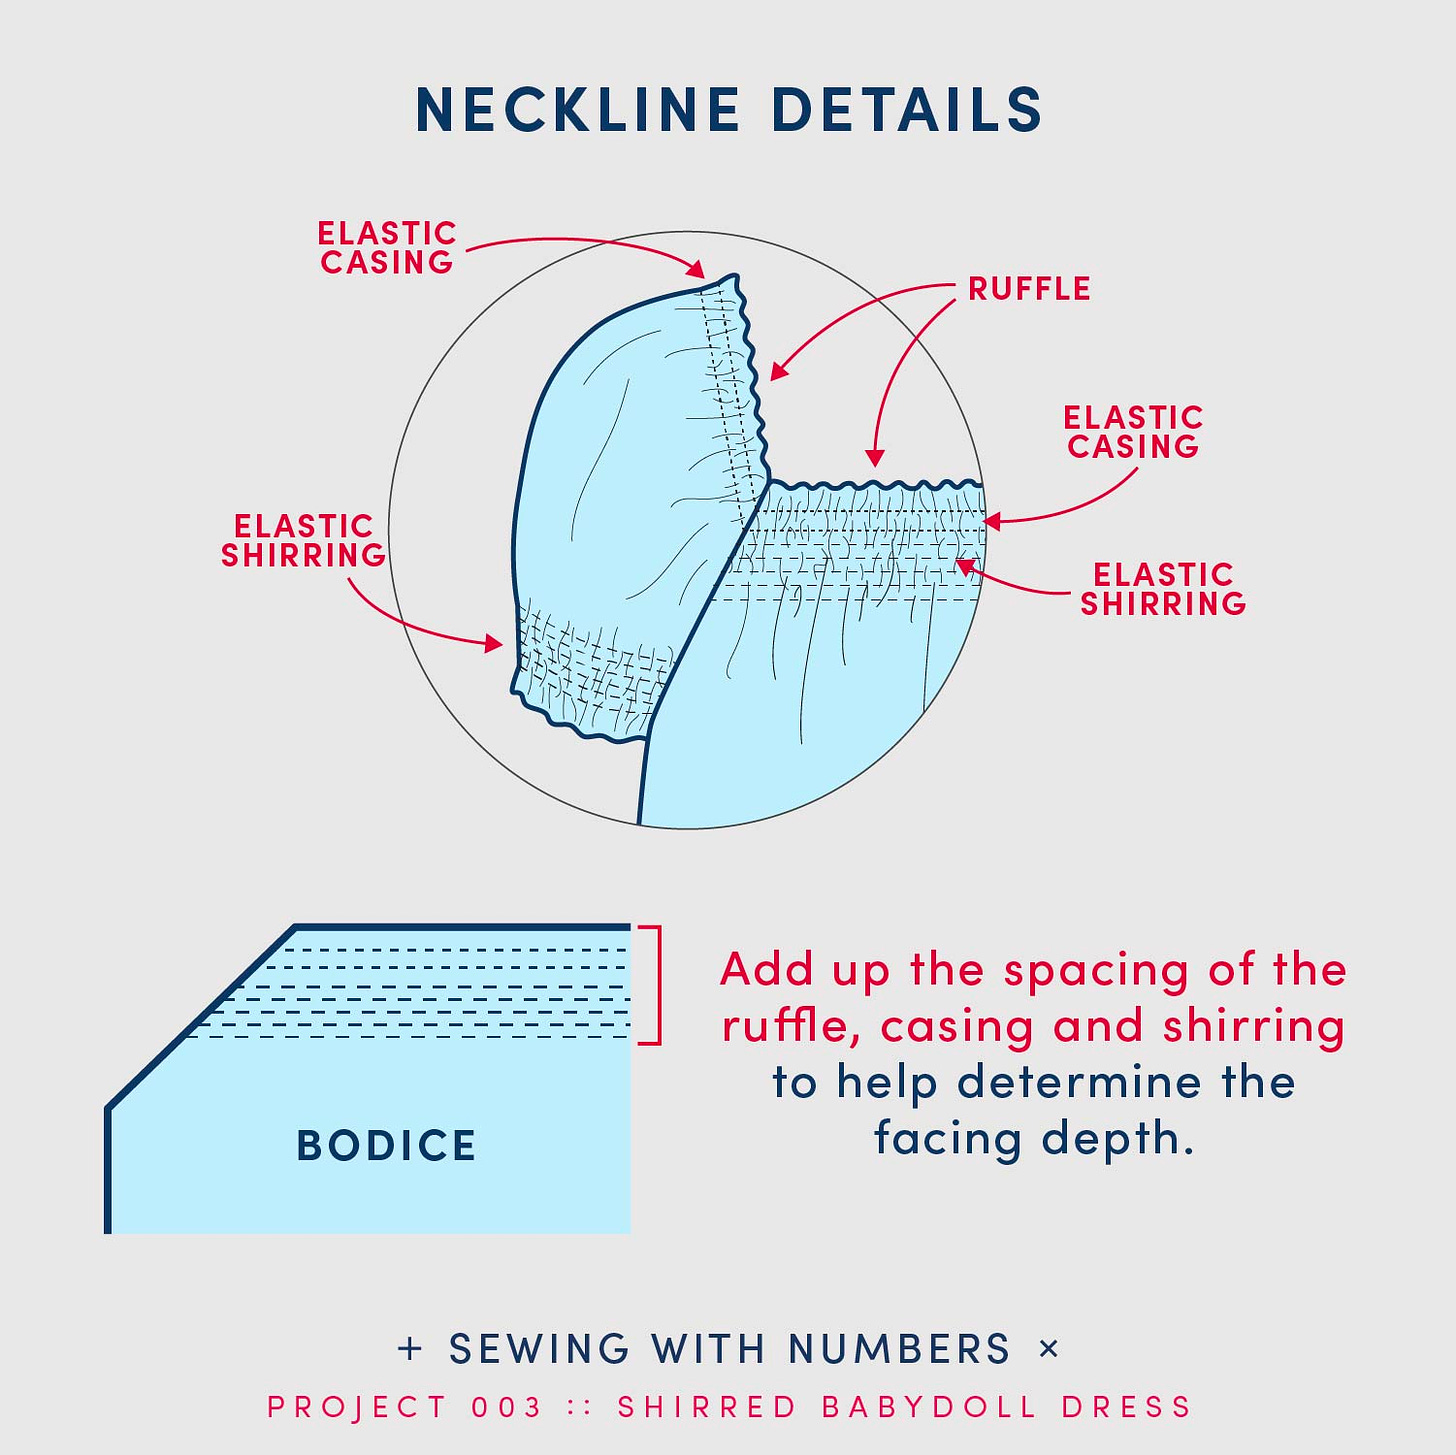
This dress is fitted at the shoulders, chest and sleeve hem with a combination of elastic in a casing and elastic shirring. On the bodice of our inspiration dress, there appears to be a small ruffle (about 1/2"), then a channel of 3/8" elastic and then five rows of elastic shirring. On the sleeve shoulder there is a small ruffle and then a channel of 3/8" elastic. At the sleeve hem, there is a small ruffle and 7 rows of shirring. You can follow this design, or create your own.
Planning our elastic spacing will help us decide how big to make the facing, in large part because the facing will also serve as the casing for the elastic. (I love when I can make a pattern piece do double duty!)
I recommend reading my earlier post How to Draft an Elastic Waistband because some of the same principles apply.
Determining Facing Depth
In general, I like a facing to be about 2.5" to 3" long so that it's less prone to flip up to the right side. In this design the facing needs to be long enough to create the ruffle, the casing and to extend past the casing. You may also want the facing to extend down far enough to cover the shirring.
In my first sample of this dress, I made 1/2" ruffle, a casing for 3/8" elastic + 1/16" of ease and a 1.5" extension. This added up to about 2.5". This length of facing would not cover all the rows of shirring. I need to do more experimentation on the construction to find the best way to finish the dress with a facing. I'd love for it to look cleaner on the inside but I also don't want to add an extra top stitching line.
Part 2: Collect information
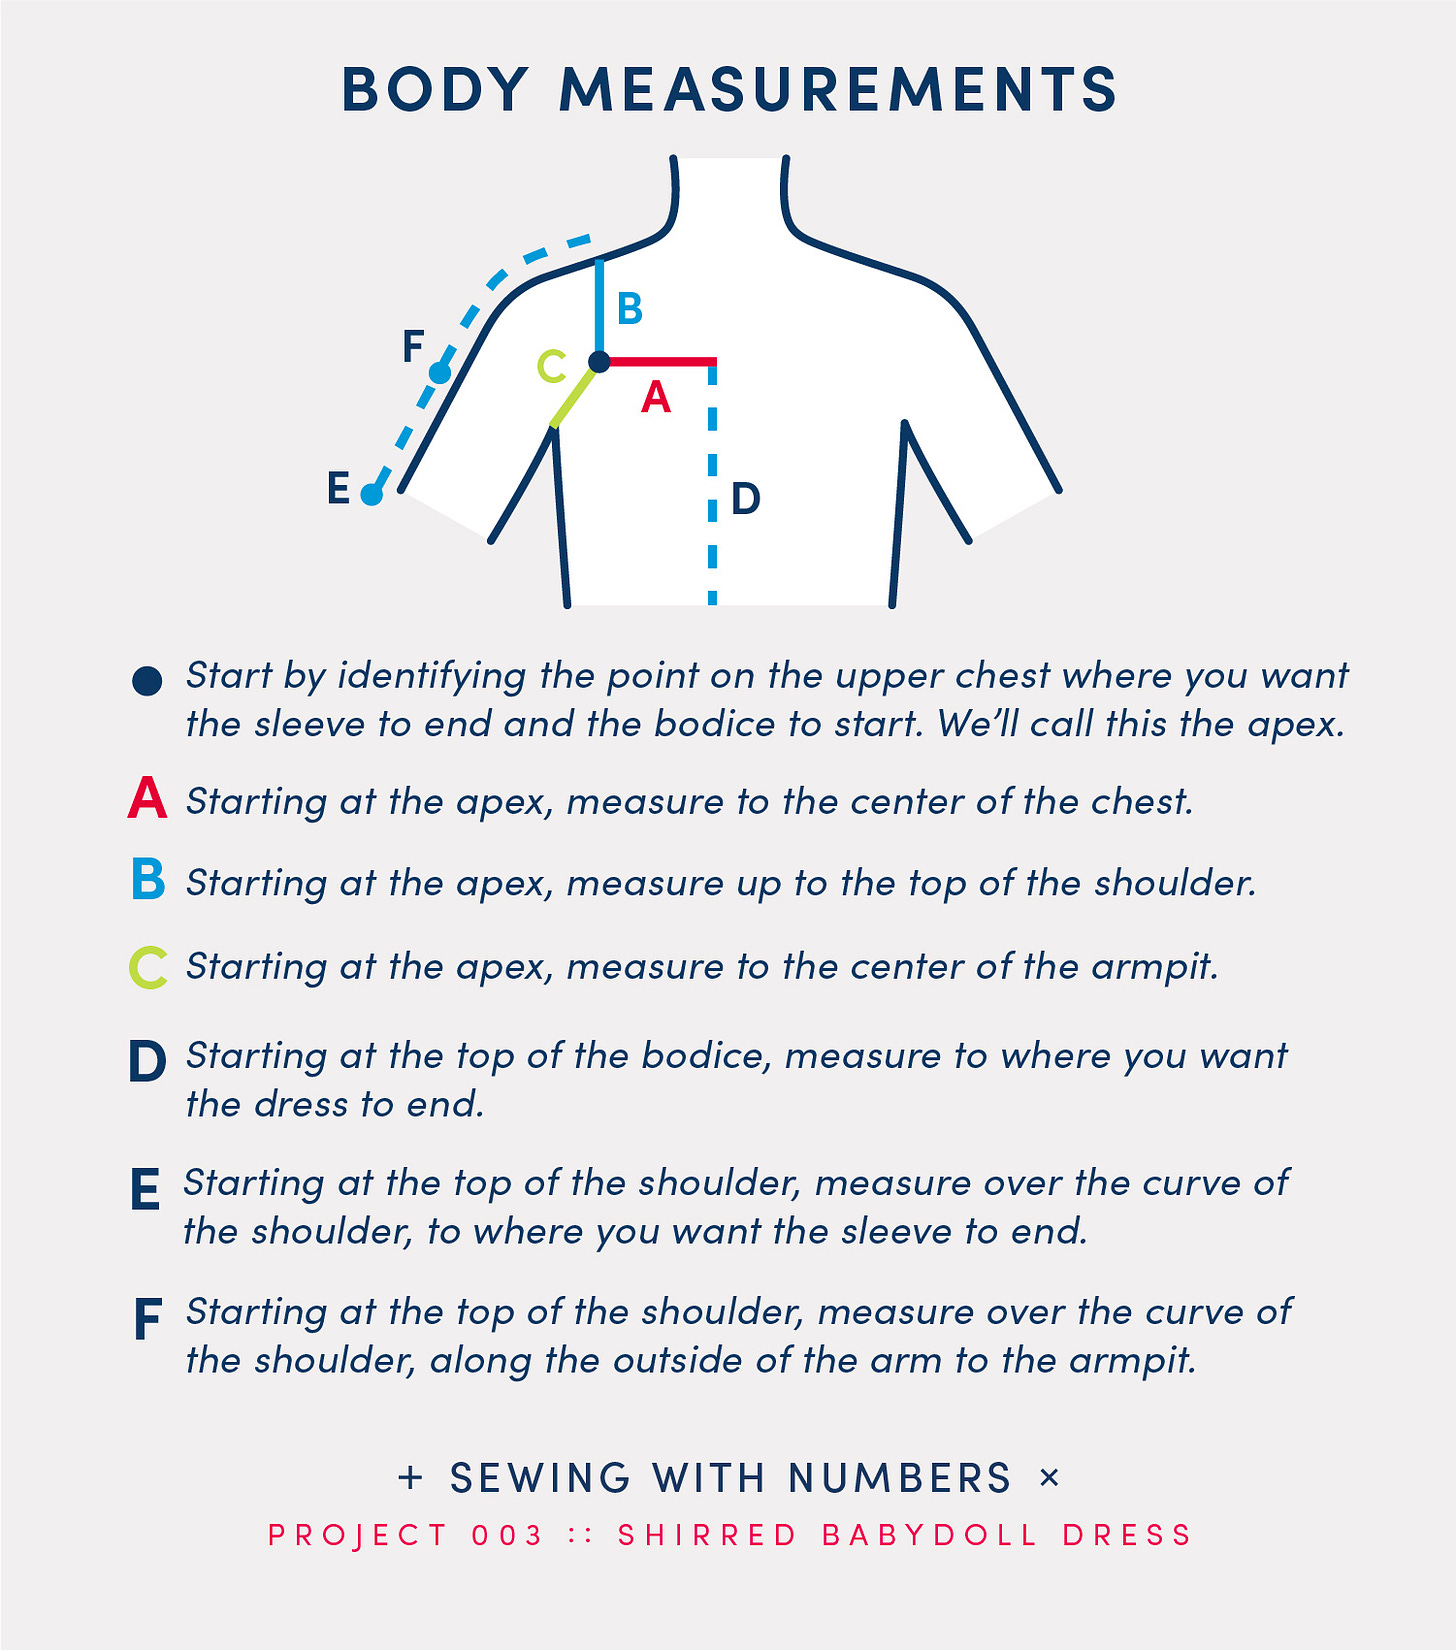
Measuring for this dress is a little different than measuring for most patterns. This dress is fitted to the shoulders and upper torso using elastic. So, we will only be measuring in that area. (See the graphic below.)
UPDATE 9/9/24: Updated the Body Measurements diagram to include E Sleeve Length.
Start by identifying the point on the upper chest where you want the sleeve to end and the bodice to start. I chose a point just inside of my bra strap, close to where the ring connects the strap to the cup. We’ll call this point the apex and it's identified by a blue circle in the graphic.
I’ve assigned a representative letter to each number we’ll need. I’ll use these letters in the drafting diagrams and formulas. When drafting your dress, you’ll replace the letters with your own numbers.
A Half Upper Chest Starting at the apex, measure straight across to the center of the chest.
B Apex to Shoulder Starting at the apex, measure up to the top of the shoulder.
C Armpit Starting at the apex, measure down at an angle to the center of the armpit.
D Bodice Length Starting at the top of the bodice, measure to where you want the dress to end.
E Sleeve length Starting at the top of the shoulder, measure over the curve of the shoulder, along the outside of the arm to the armpit to where you want the sleeve to end. If you want extra pouf in your sleeve, add more to this length.
F Shoulder to Armpit Starting at the top of the shoulder, measure over the curve of the shoulder, along the outside of the arm to the armpit, as shown in the diagram. (We're going to use this measurement to make a more even length to the sleeve hem.) One way to measure this is to tie a piece of elastic around your arm and slide it all the way up to the armpit. Then, with your opposite hand hold the top of the measuring tape at the top of the shoulder where the edge of the dress will sit and let the tape fall down over the arm to the elastic.
G Ease at armpit For more comfort and ease of movement at the underarm, we want to add some ease to this measurement. I recommend trying 1.5 to 3". If you want the armpit to hang lower, add more.
H Seam allowance Designer's choice!
I Hem allowance Designer's choice!
For this draft, I'm using a gathers multiplier of 2. I wrote more about what the gathers multiplier is in the post linked below. You may want to reduce the gathers multiplier to save fabric or increase it to have more circumference in the body. In my next post I'll talk about how to
Gathers multiplier (See the previous lesson on gathers to choose your multiplier.)
Part 3: Draft the bodice
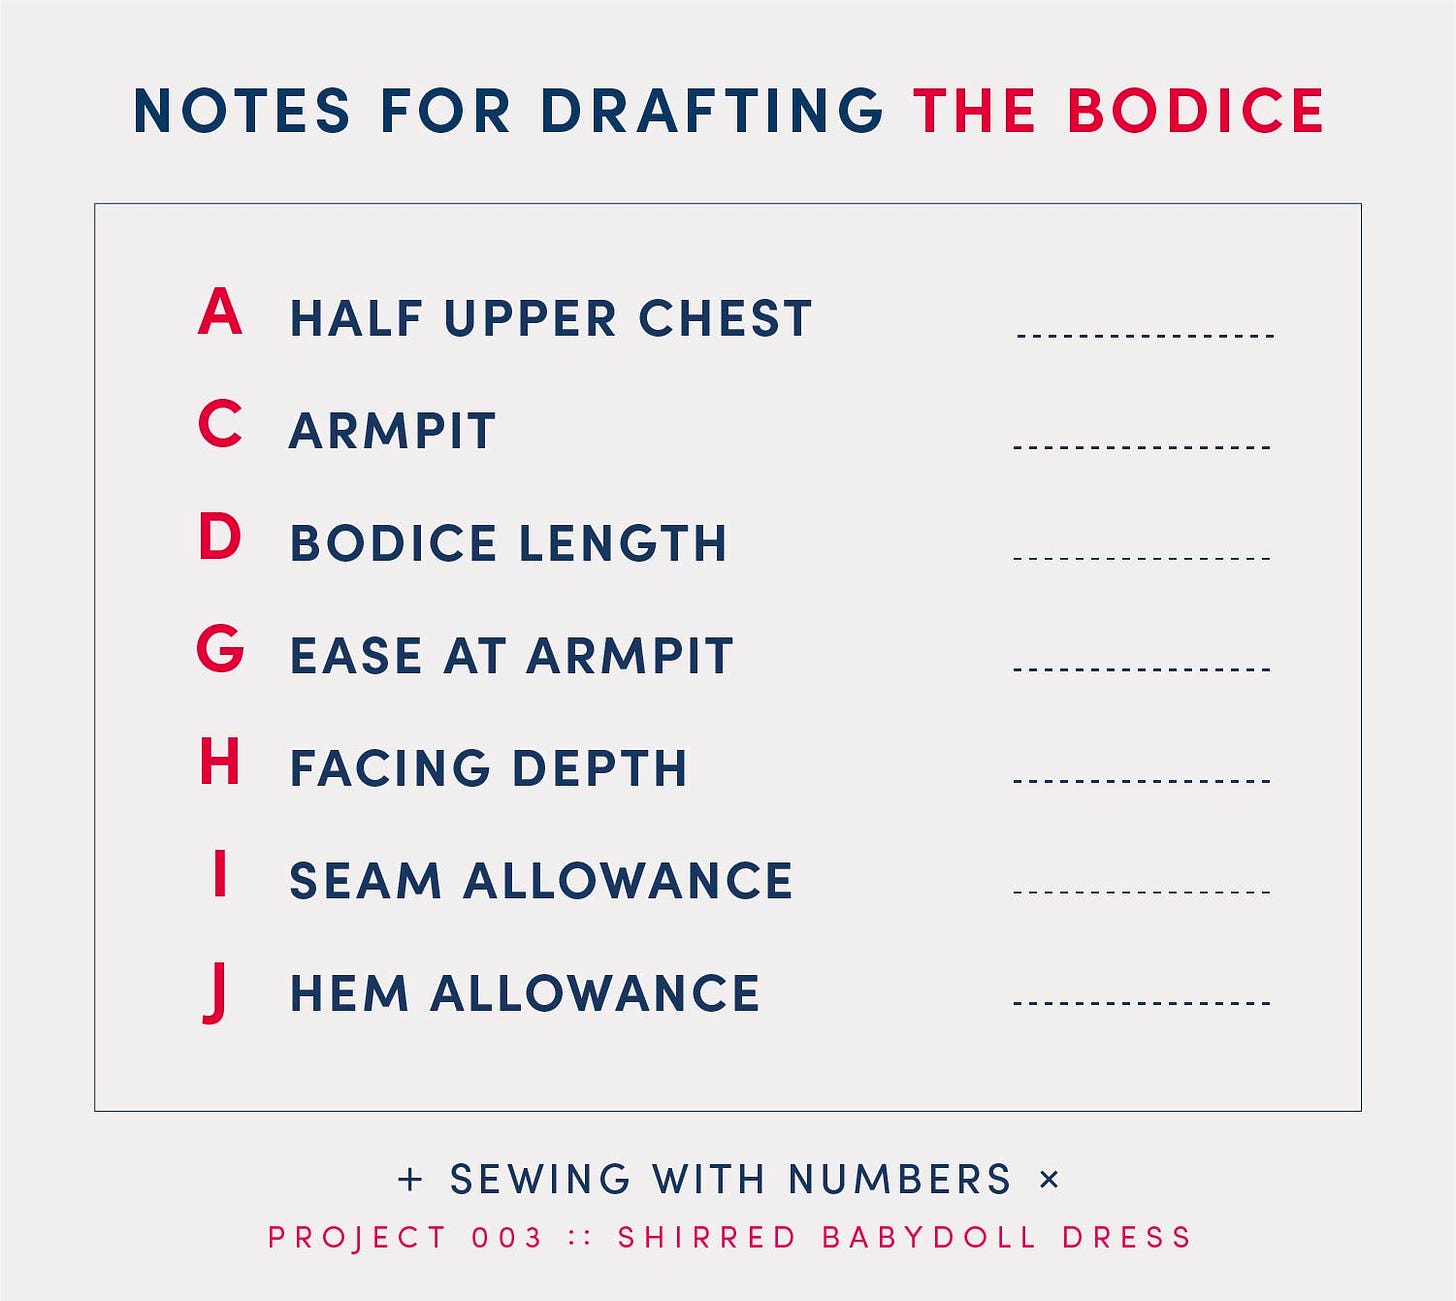
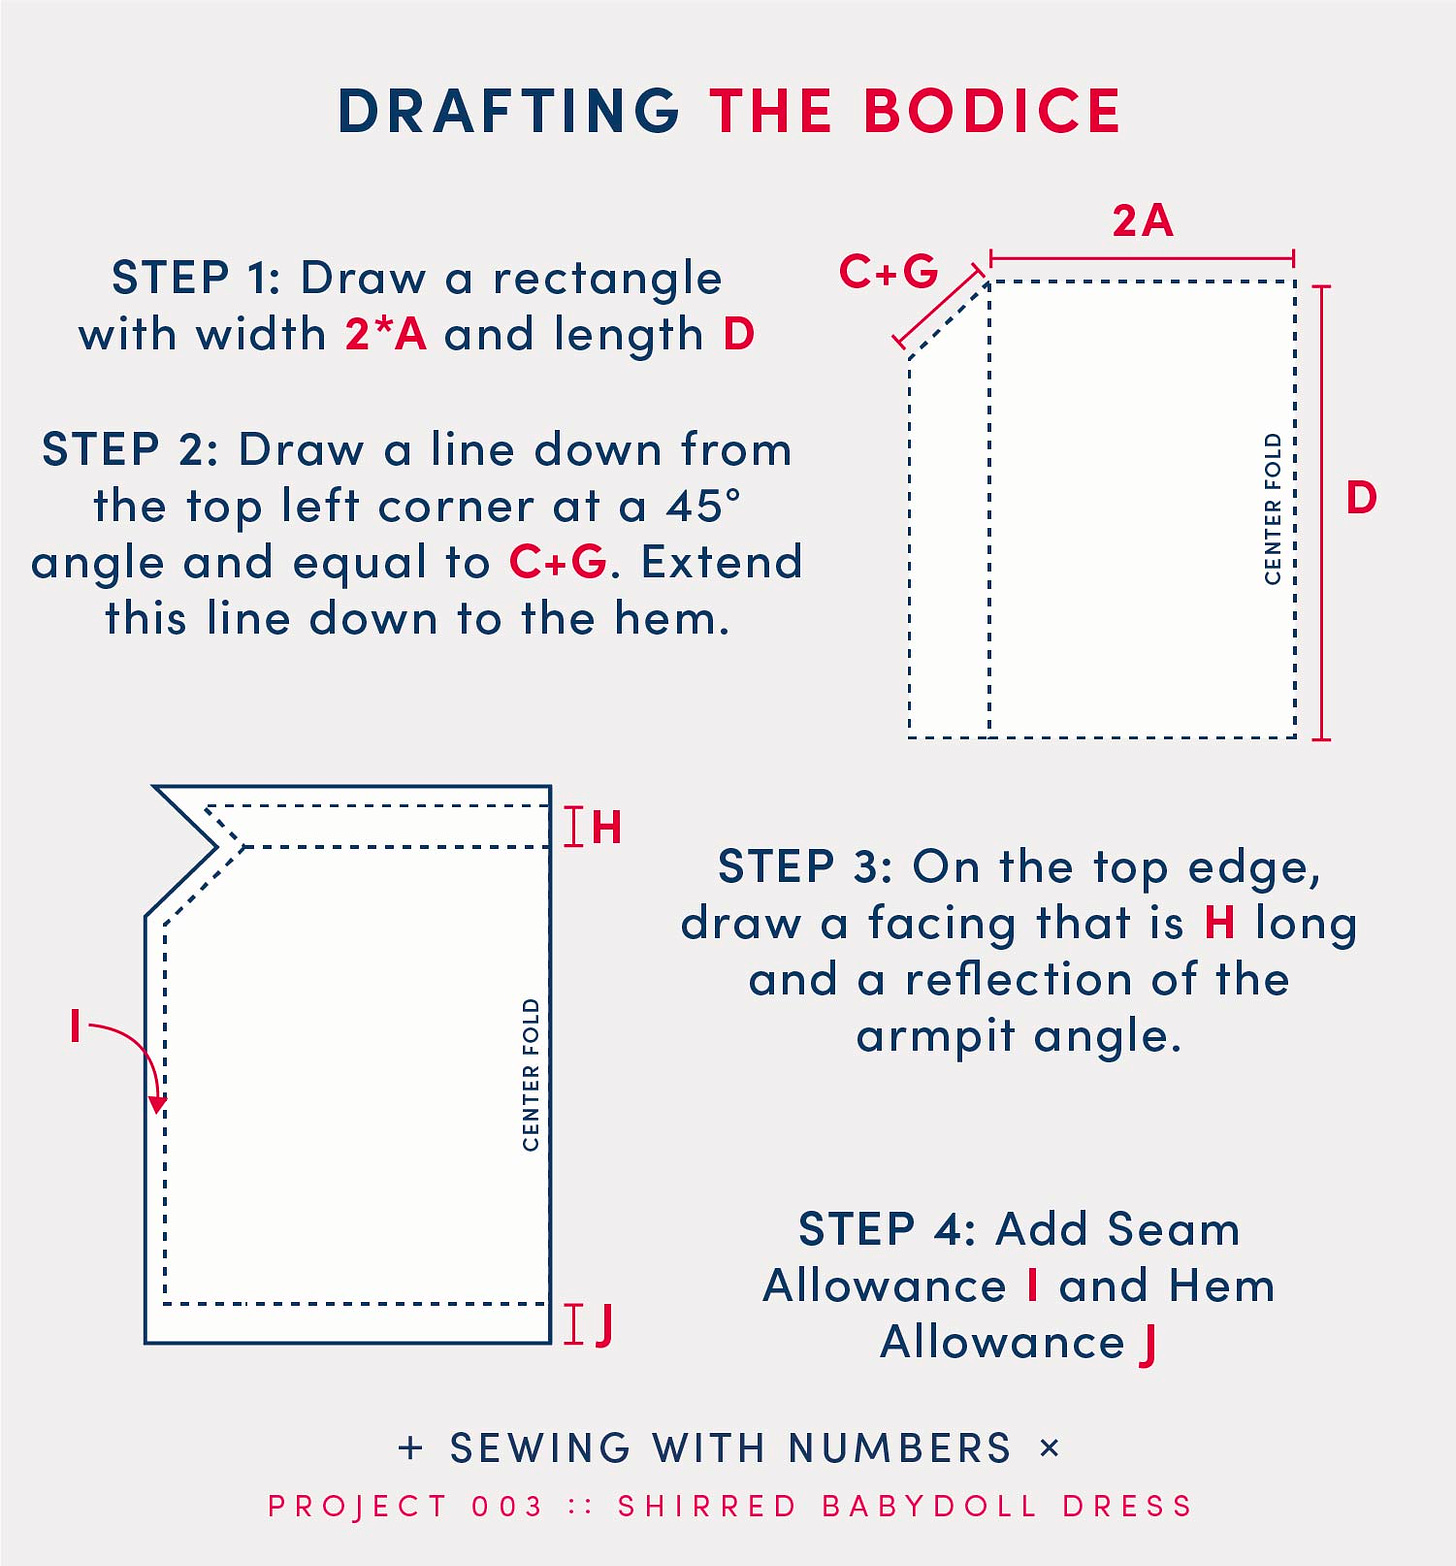
To draft the bodice, you’ll need numbers A, C, D, G, H, I and J. It might seem like a lot of info but the drafting is pretty approachable. This pattern piece is drafted on the fold with the fold on the right edge of the pattern.
Step 1: Draw a rectangle that is 2 times A Half Upper Chest wide by D Bodice Length long. (As I mentioned earlier, 2 is the gathers multiplier. You can change this if desired.)
Step 2: Starting at the top left corner, draw a line down at a 45 degree angle that is equal to C+G (armpit plus ease at armpit). Draw a second line down from the C+G line that is parallel to the center fold. Extend this line down to the hem and connect it to the hem line.
STEP 3: On the top edge, draw a facing that is H Facing Depth long and a reflection of the armpit angle. You can start by drawing H up from the top right corner, then draw a line at 90 degrees going to the left. From the apex point draw another 45 degree line up to meet the top edge of the facing.
STEP 4: Add Seam Allowance I to all sides except the center fold and hem. (You may also not want to add seam allowance to the facing edge. Add the Hem Allowance J to the bottom edge.
Part 4: Draft the sleeve
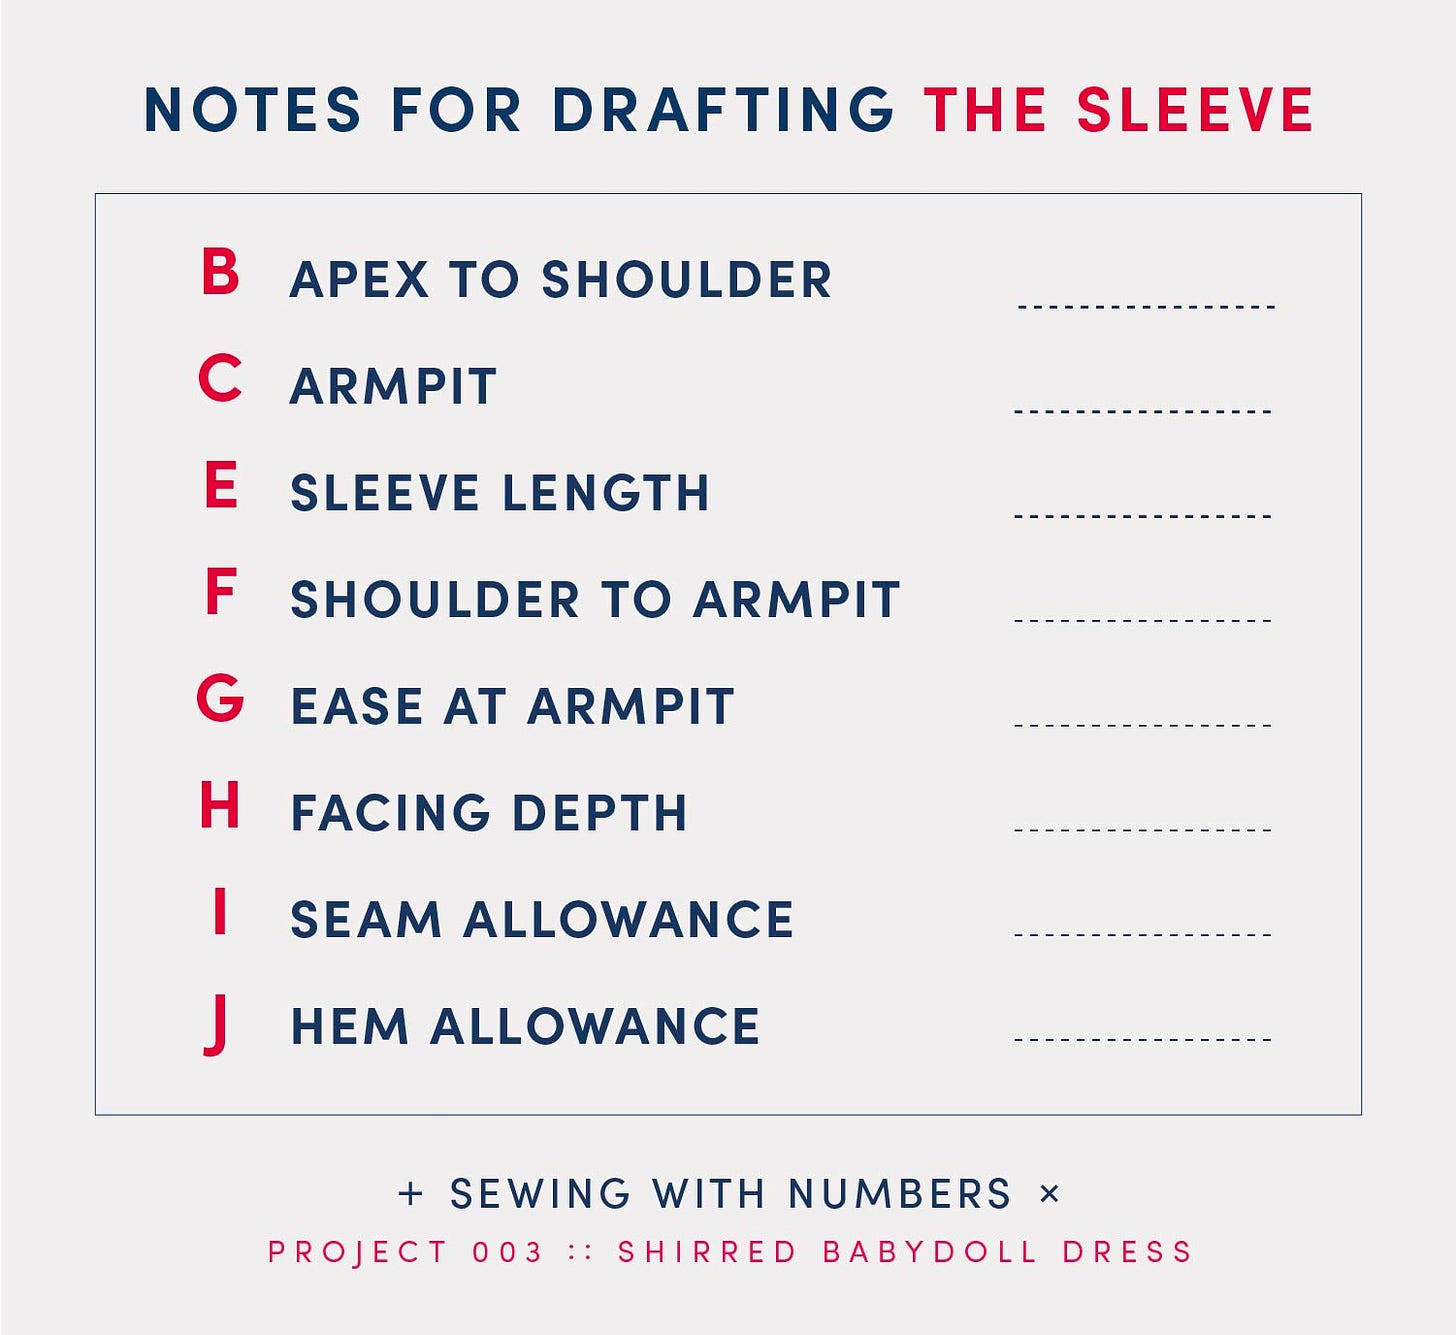
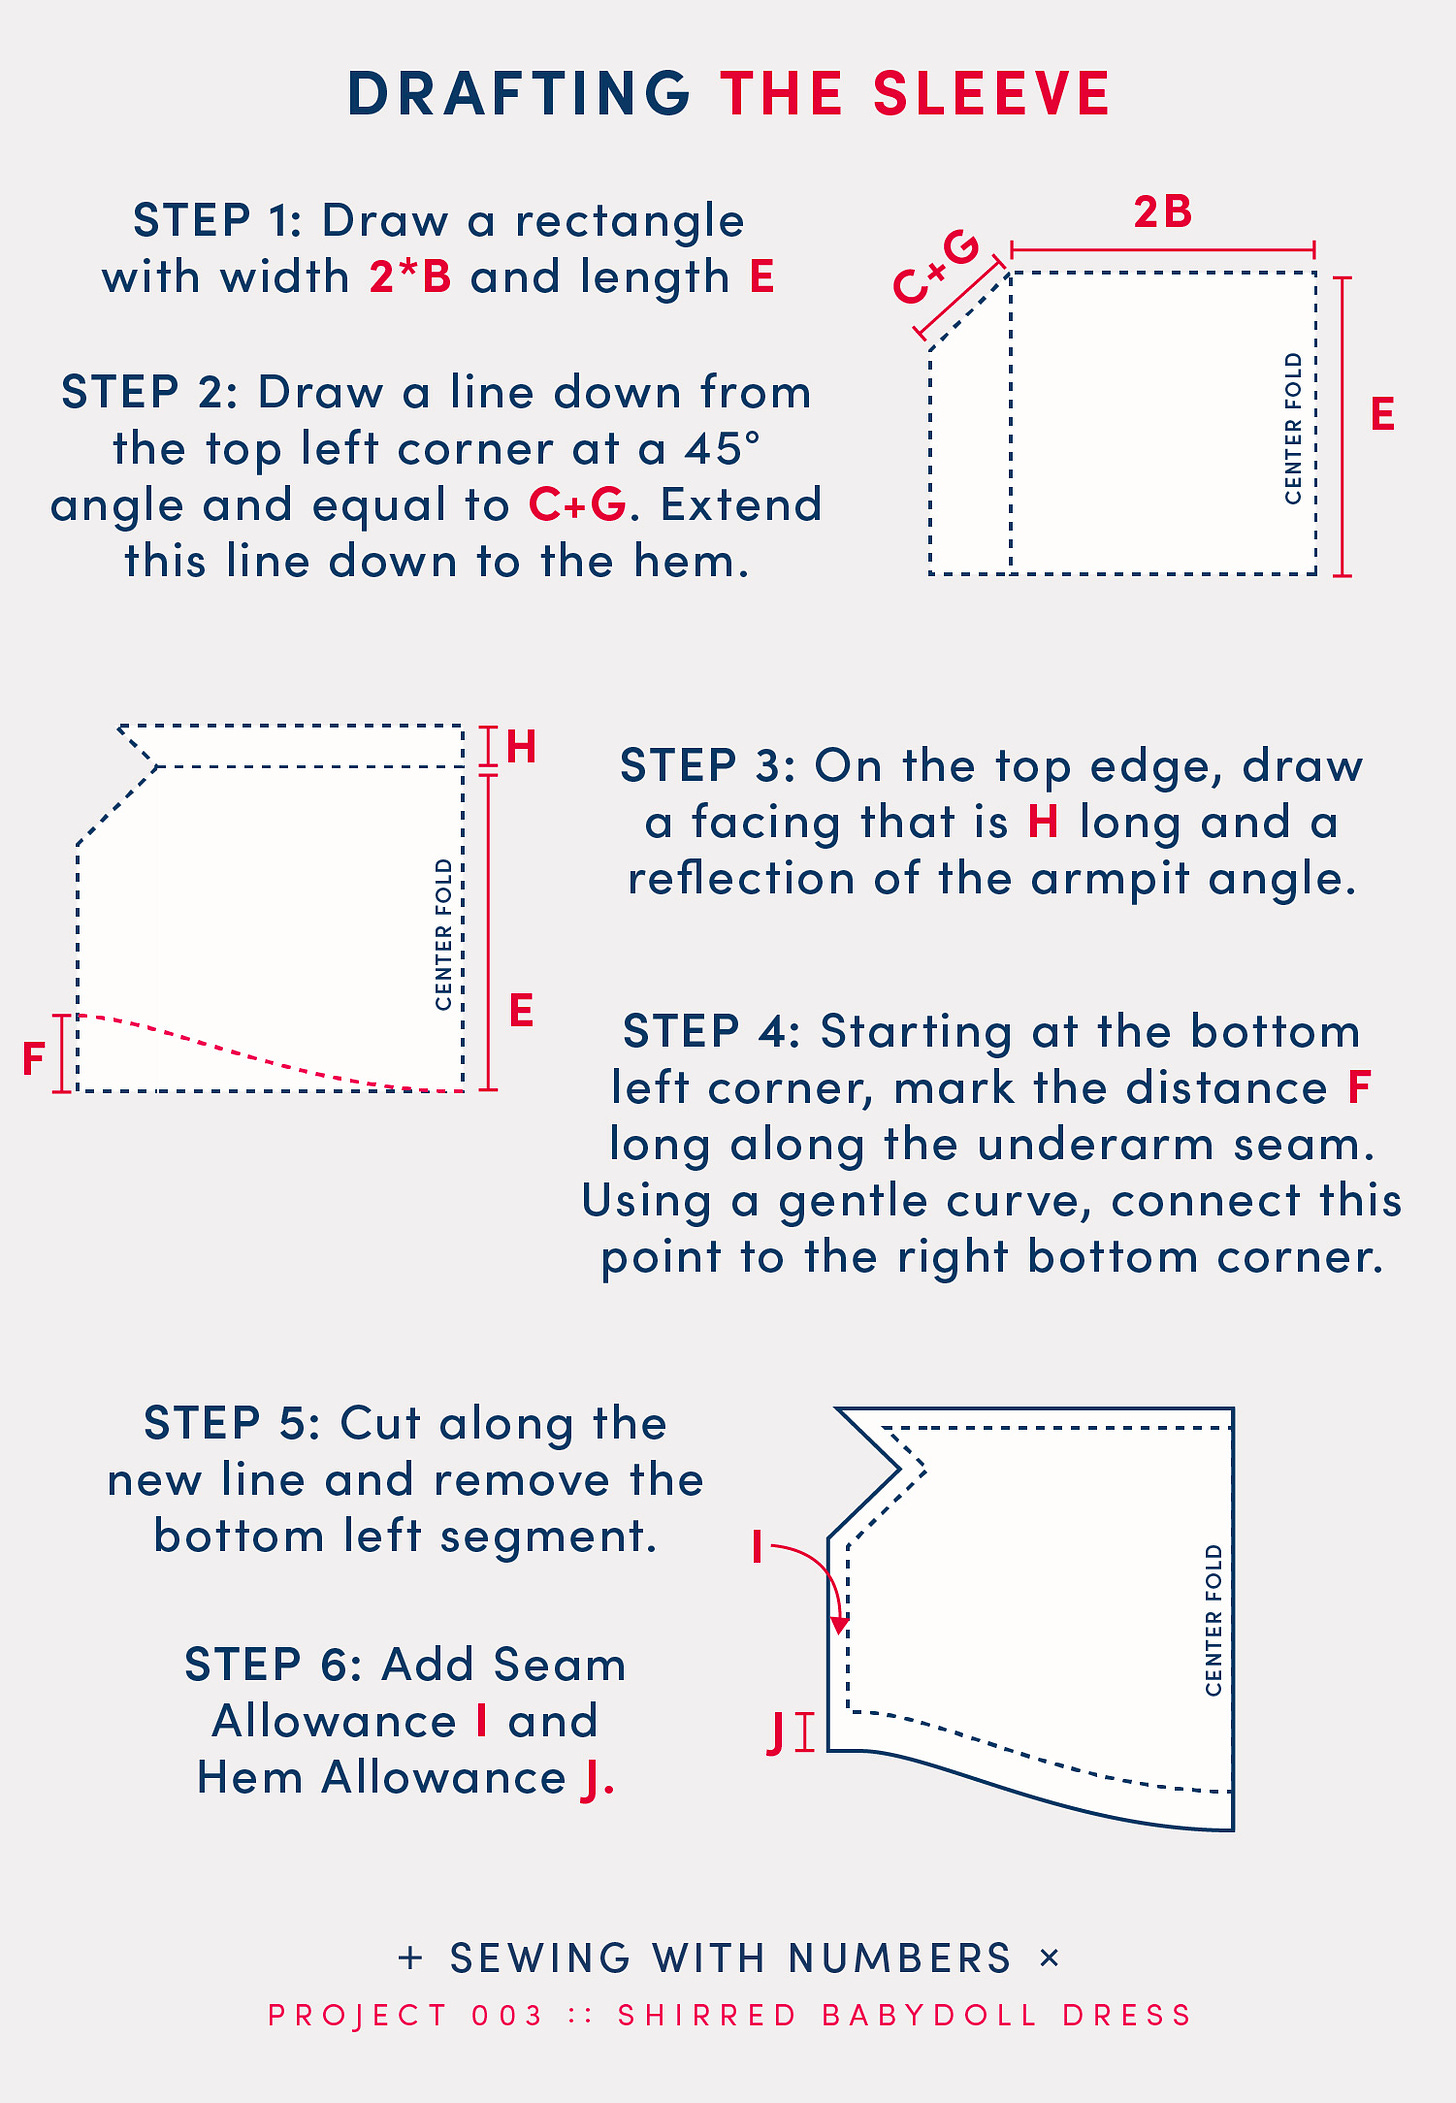
To draft the sleeve, you’ll need numbers B, C, E, G, H, I and J. The drafting is very similar to the bodice with an extra curve at the bottom to even out the sleeve hem. Like the bodice, this pattern piece is drafted on the fold with the fold on the right edge of the pattern.
UPDATE 9/9/2024 Initially, I was adding F to the bottom center of the sleeve but I realized that we should actually subtract F from the bottom of the underarm for a more accurate length to the sleeve based on measurement E.
Step 1: Draw a rectangle that is 2 times B Apex to Shoulder wide by E Sleeve Length long. Like the bodice, 2 is the gathers multiplier. You can change this if desired.
Step 2: Starting at the top left corner, draw a line down at a 45 degree angle that is equal to C+G (armpit plus ease at armpit). Draw a second line down from the C+G line that is parallel to the center fold. Extend this line down to the hem and connect it to the hem line.
STEP 3: On the top edge, draw a facing that is H Facing Depth long and a reflection of the armpit angle. You can start by drawing H up from the top right corner, then draw a line at 90 degrees going to the left. From the apex point draw another 45 degree line up to meet the top edge of the facing.
STEP 4: Because the middle of the pattern piece starts at the top of the shoulder and the outside edges are at the under arm, we need to add a curve to the bottom that will even out the hem. (If you skip this step, the sleeve will have a kind of waterfall look that is higher in the center and lower under the arm. You can do this on purpose, if you wish.)
Starting at the bottom left corner, along the underarm seam line, mark the distance F Shoulder to Armpit along the underarm seam. Using a gentle curve, connect this point to the right bottom corner (shown in red).
STEP 5: Cut along the new line and remove the bottom left segment.
STEP 6: Add Seam Allowance I to all sides except the center fold and hem. (You may also not want to add seam allowance to the facing edge.) Add the Hem Allowance J to the bottom edge.
Part 5: Your handy worksheet
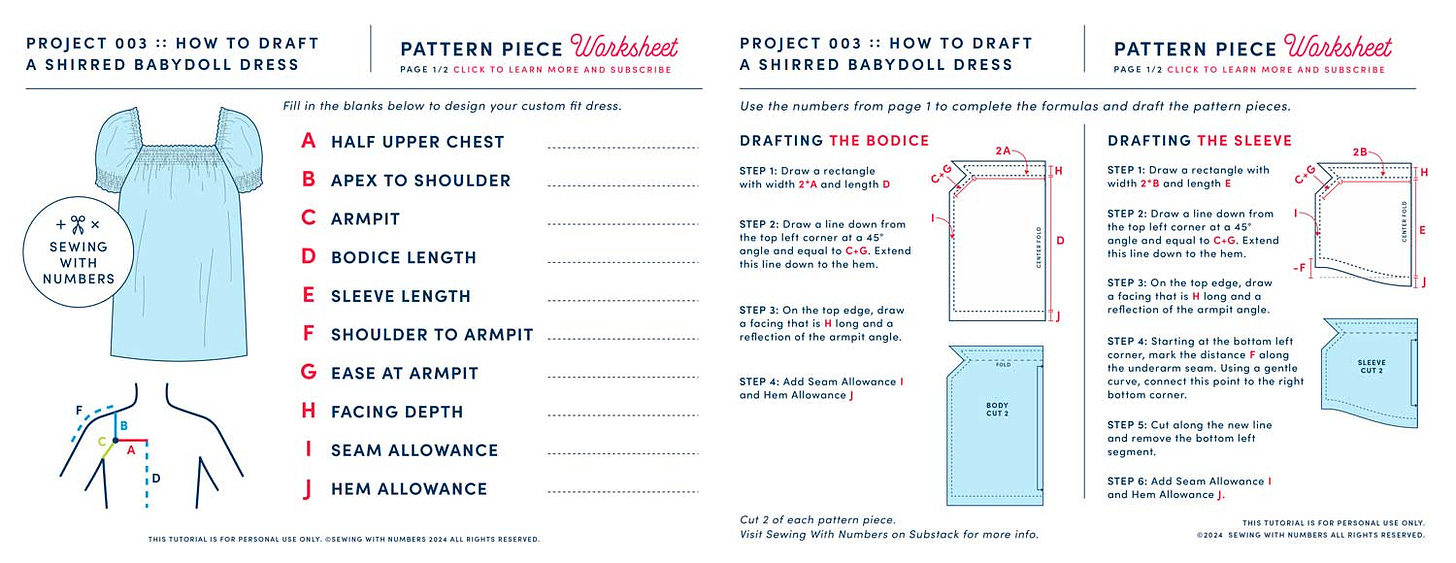
Last but not least, I created a printable pdf worksheet that you can use to record your measurements and as a quick reference for drafting this dress. See preview above. Click below to download it (updated 9/9/24).
I hope that you enjoyed this tutorial! Next week, I’ll be talking about calculating the finished measurements, estimating fabric usage and, if there’s time, how to add a dart to fit a full bust. (If the post gets too long, I’ll break out the dart info into a separate post.) If you enjoyed this newsletter, you can support by sharing or clicking the heart at the top or bottom of the post.
Thank you so much for following along! These resources are FREE to use for the time being. I am planning to turn on paid subscriptions for Substack in the future and will likely archive this post. At that time, it will only be available to subscribers. So, make sure to download and save now, if you're interested.
Happy mathing!
Beth
You can support this newsletter by subscribing and sharing or check out the links below.
Visit me elsewhere on the web:
Pattern Shop | Improv Quilting E-Course | Instagram | YouTube

