Introducing Project 002: Sunhats
Get all the basics on our next drafting project including the post schedule and terminology.
Hello my mathy-sewing friends! First off, thank you so much for the warm reception to this Substack and the first project—the Elastic Waist Tiered Skirt. I'm completely in awe that there are more than 1000 subscribers to this little newsletter! Thank you!
Update 02/2025: The tutorials in this series are now archived for paid subscribers. If you are interested in this project you can upgrade to a paid subscription. Or, you can purchase a pdf version of this project in my shop.
Project 002 is Sunhats
For our last project, we made an entire skirt only using rectangles. For this project, we are branching out and playing around with circles, ovals, cones, curves and even spheroid shapes. The math is not as straightforward and will require a bit more trial and error. (That's just how it goes for some projects.)
Just like with our first project, my goal is to break the process down into digestible lessons that build on each other. We'll start with the most basic hat draft, a stovepipe hat, and then add a bit of shaping to make a bucket hat and finish off with a hat with a rounded crown.
Project 002 Sunhats — Planned schedule of posts
June 14: Introduction & Terminology
June 21: Drafting with Circles and Curves and Taking Hat Measurements
June 28: How to Draft a Flat Crown Hat
July 5: How to Draft a Bucket Hat
July 12: How to Draft a Rounded Crown Sunhat
July 19: Design Variations
July 26: Project Journal/Q&A
So why sunhats? I am a big fan of sun protection and wearing a hat to protect my skin and eyes. Most hats are just three pattern pieces so I thought it would also be an approachable project.
To be honest, my experience with drafting and sewing hats is pretty limited. But, I've been doing a lot of research the past few weeks and I've been really surprised that most of my pattern drafting books say nothing about hats. In fact, the one book I have that addresses hats does a pretty poor job of it. (Definitely a gap in the market there!)
Despite the lack of textbook instruction, we will forge ahead. After all, this is just a little 3D geometry. And, if you'll allow me to brag a little bit, I did design and make some hats once that were VERY well received.
When I was a teenager, or perhaps in my early 20s, I made my youngest brother some Cat in the Hat style hats. (He had an adventurous personal style.) I drafted the pattern myself and made the hats out of felt. And, he loved them. Drafting that stovepipe style hat is really pretty easy so we’ll start there and then explore adding more shaping.
Hat Pattern Terminology
I’ve noticed that people use different words for the hat parts so I’d like to establish what terminology I’ll be using and hopefully avoid any confusion.
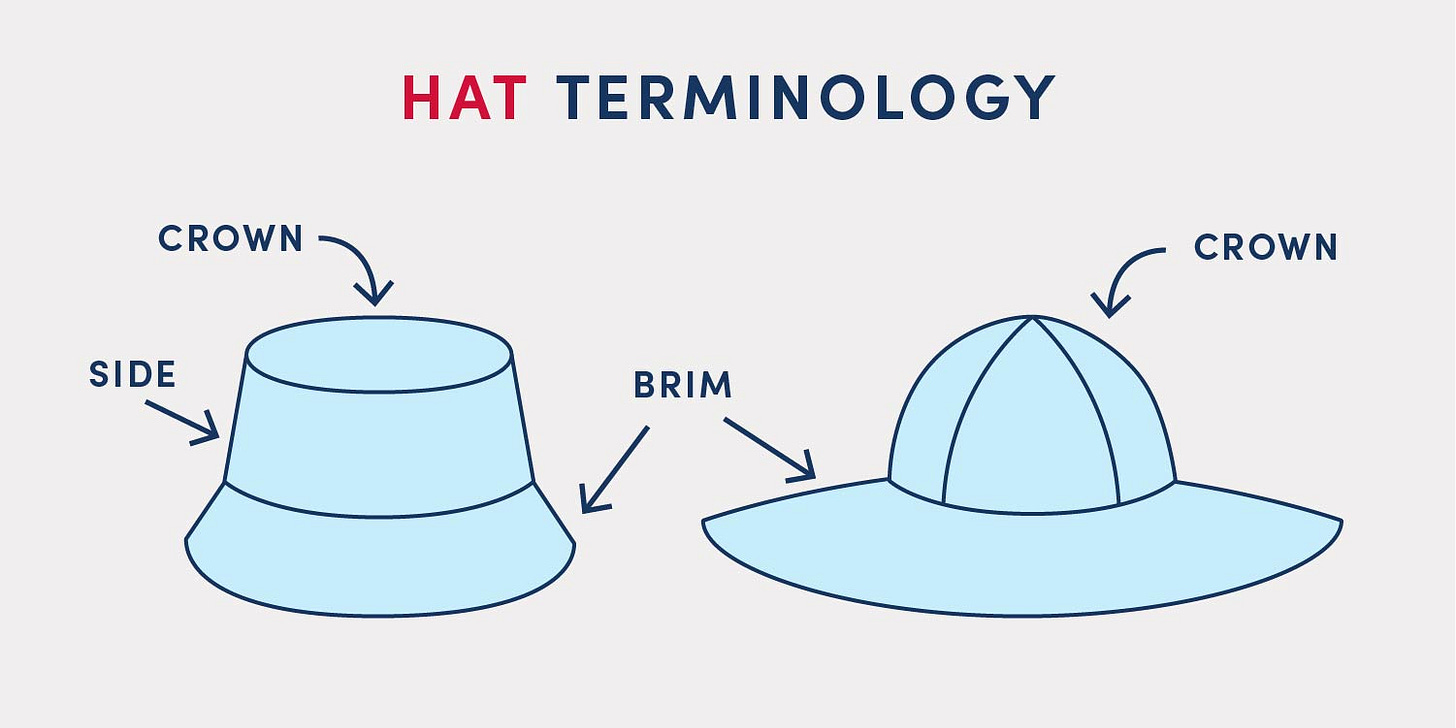
Crown The crown is the top of the hat. The crown can be a flat, like the bucket hat shown above. Or, the crown can be multiple panels that curve over the entire head.
Brim The brim is the part that extends out from the head (usually at the largest part of the head, just above the eyes and ears.
Side For designs that have a flat top, like the bucket hat shown above, there is also a side piece that wraps around the head.
Circle Terminology & Formulas
A little circle geometry refresher so we can all start on the same page.
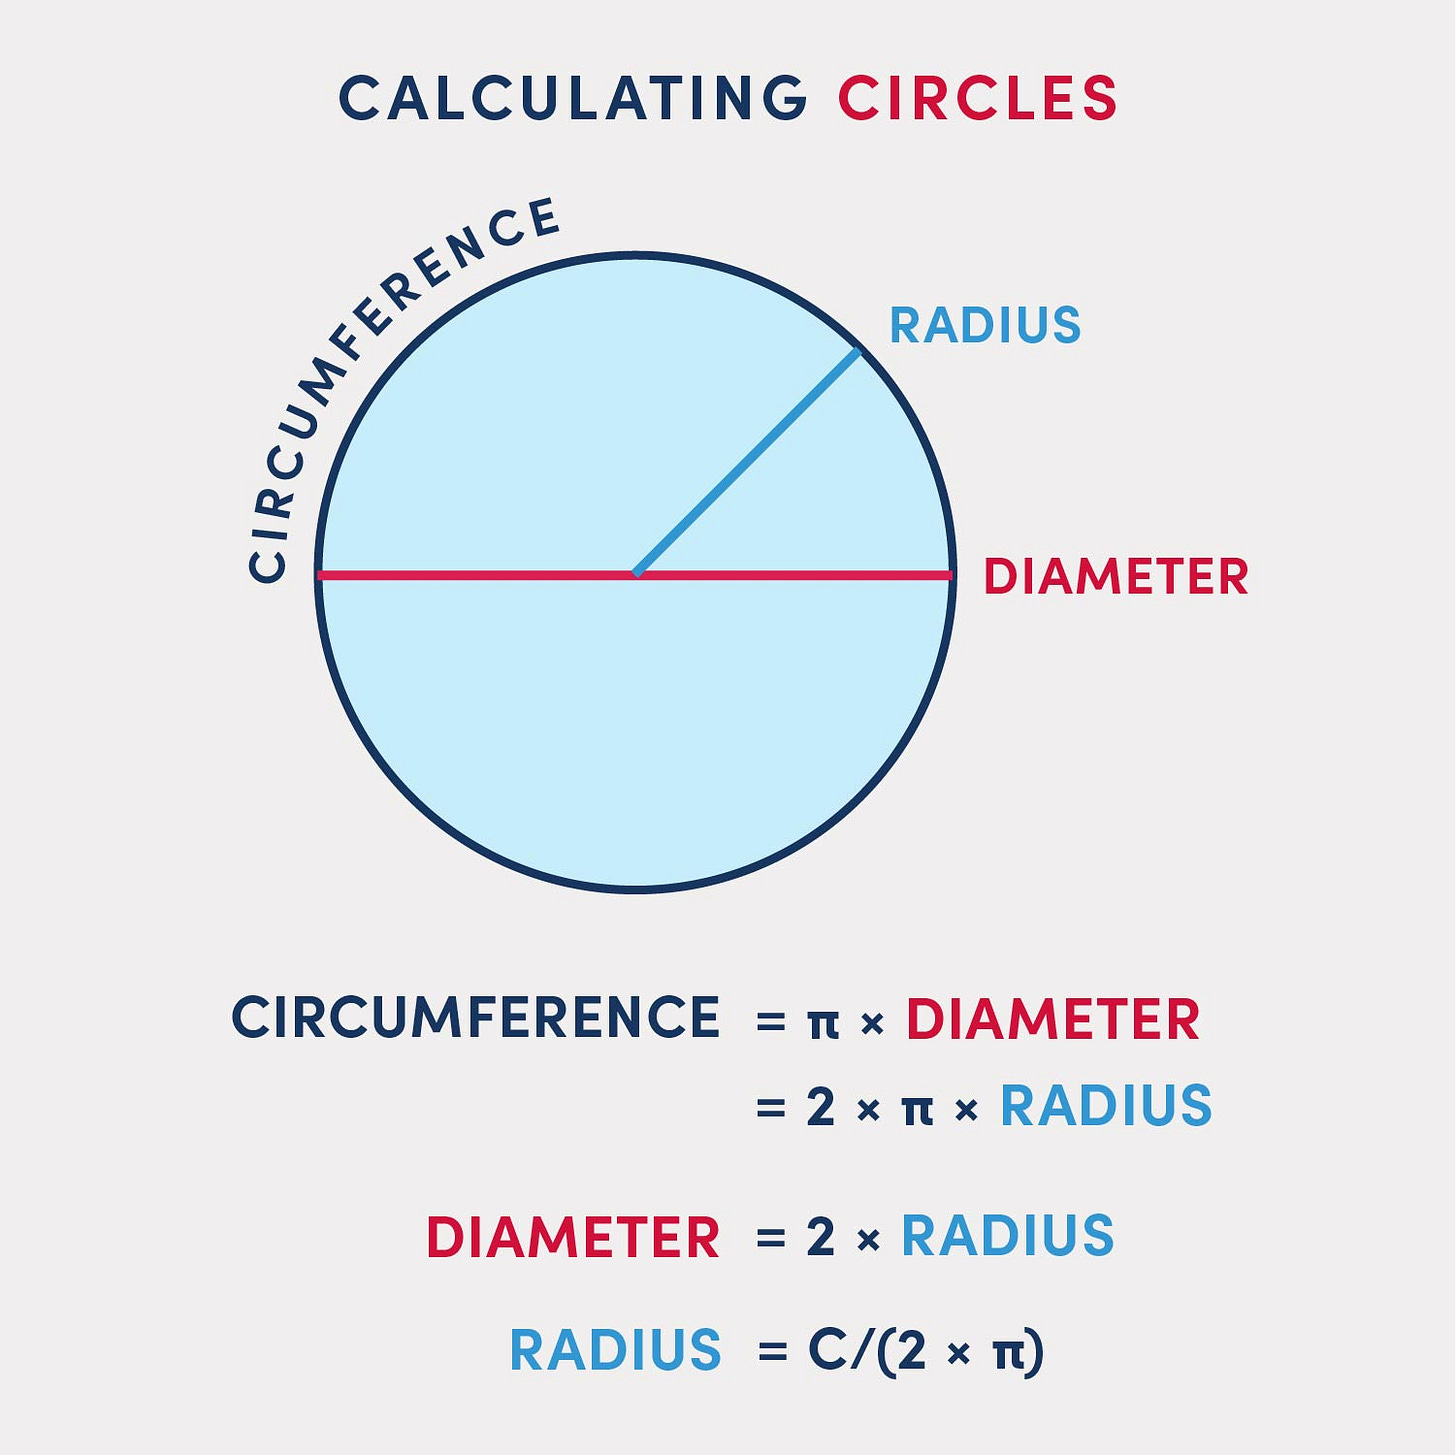
Diameter The distance from one side of a circle to the other, measured when passing through the center of the circle.
Radius The radius is measured from the center of the circle to the edge and equals 1/2 the diameter.
Circumference This is the measurement of the edge of a circle or oval. To calculate the circumference of a circle we can solve C=2πR=πD. Or, in words, the circumference equals 2 times the radius times pi. Or, pi times the diameter.
In our first drafting lesson, we will be use our head circumference to calculate the radius of a circle: R = C/2π.
A note on ovals/ellipses We will be using ovals (aka ellipses) for some of our drafting. Ovals fit the head more accurately than a circle but they are a pain to handle using math formulas. So, we’re just going to avoid it. (Hopefully that’s not disappointing. I love using math formulas because you can be so exact. But, in this case, I think it’s just not worth the effort when we can measure an oval manually. More on that in the coming weeks!)
I hope you'll join me for Project 2! You can support the newsletter by subscribing and sharing or check out the links below.
Happy mathing!
Beth
Visit me elsewhere on the web:
Pattern Shop | Improv Quilting E-Course | Instagram | YouTube
Additional Hat Drafting Resources
Stitching Vulture Free resources and YouTube
Mad Cap Hats on YouTube


I was a drafter for 22 years. We made pattern for copper with seams. I will apply this knowledge to a hat.
btw, i sew only by hand
Ellen O
I’m looking forward to making these projects. Hopefully the sun will shine in Scotland long enough for me to use them!