Shirred Babydoll Dress — Project Journal
Today, I'm sharing my sewn sample of the self-drafted dress along with notes on drafting, fabric selection and construction.
Before we dive in, I want to mention here that I updated the drafting instructions to the sleeve pattern piece for this project. Make sure to check it out here. If you've already drafted and cut out the sleeve, it may be a bit longer than you want—nothing that's not easily edited.
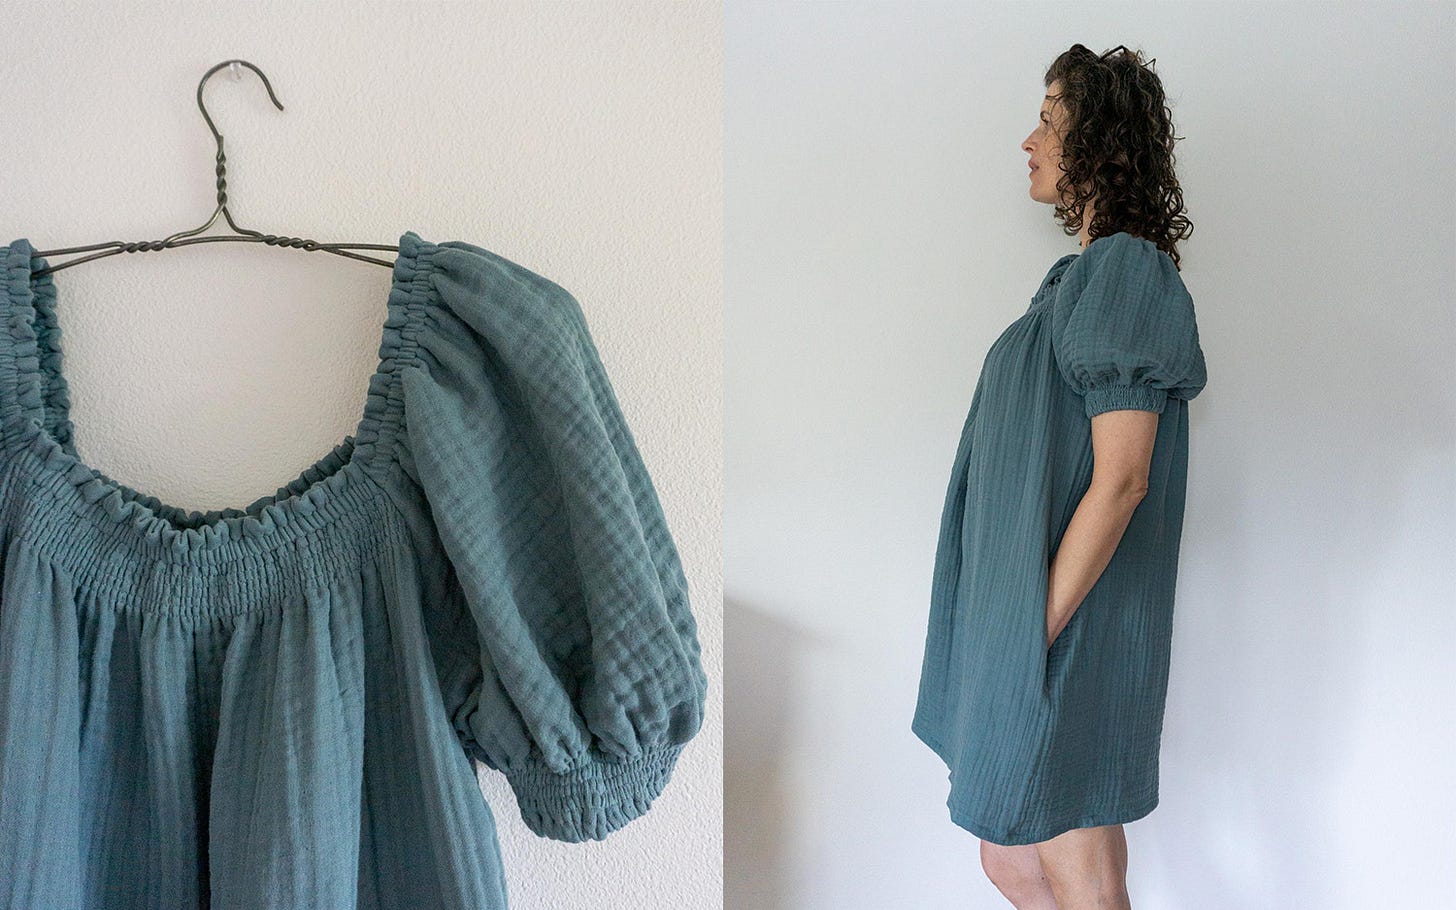
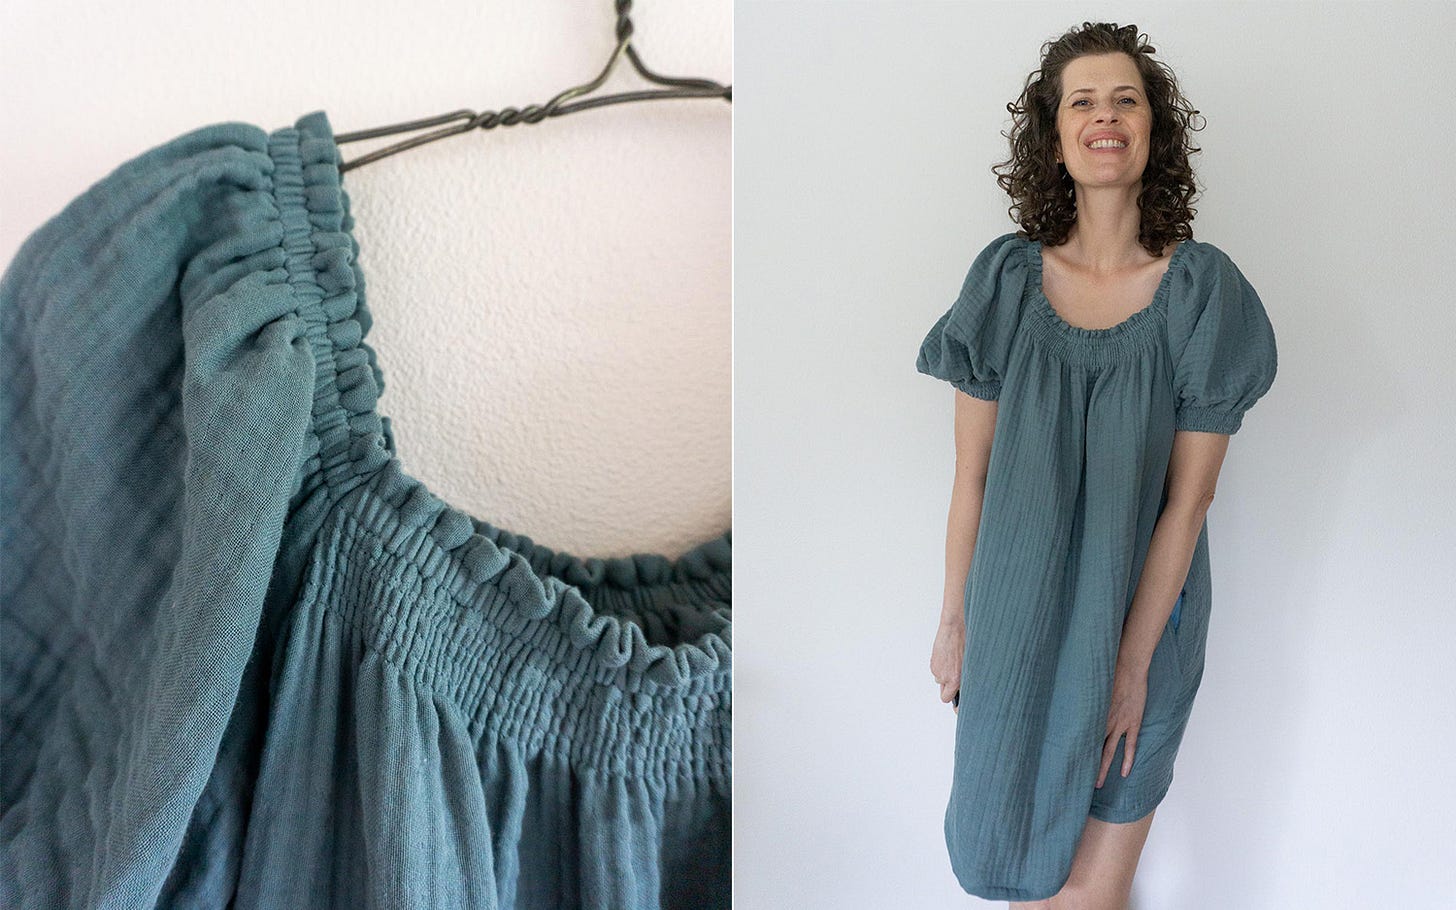
Hello my mathy sewing friends! Today, I'm sharing my own version of the Babydoll Shirred Dress. I'm really pleased with how it turned out and I think it's a great dupe for the inspiration dress. One of my favorite things about sewing is being able to see something and recreate it to fit my own needs and wants. It feels like alchemy.
I’ve been thinking about recreating this design for months and finally seeing it side by side, I’d say it’s a really close dupe. The only thing I’d change is to reduce the ease, especially in the sleeves. These sleeves are decidedly PUFFED in a way that Anne Shirley would certainly approve of. Read on for all the details.
If you missed any of the earlier posts in the series, you can click here to read them.
Update 02/2025: The tutorials in this series are now archived for paid subscribers. If you are interested in this project you can upgrade to a paid subscription. Or, you can purchase a pdf version of this project in my shop.
Drafting the Dress
Click below to check out my tutorial for how to draft this dress.
In case it's helpful for you, I used the following measurements. For reference, my current body measurements are upper bust 34.5", full bust 38.5", waist 28.5" and hips 39.5". I generally wear a 36D bra and have relatively narrow shoulders. Also, I'm 5'11"+ so my lengths are probably longer than yours.
A Half upper chest 5.5"
B Apex to shoulder 6"
C Armpit 5"
D Bodice length 33.5"
E Sleeve length 14"
F Shoulder to armpit 6.5"
G Ease at armpit 1.75" (This feels very comfortable to me. My first muslin had zero armpit ease and while it's wearable, it was a little uncomfortable and I think too much strain would be put on the seam. With this amount of ease, I don’t think about the armpit seam at all while wearing it, which I think is the ideal.)
H Facing depth 2.5"
I Seam allowance .5"
J Hem allowance 1.5"
Per a reader request, above are photos of my pattern pieces. (I was really surprised how short the underarm of the sleeve ended up being.) I drafted the pattern to have a gathers multiplier of 2. But, I folded in the center fronts and cut with a Gathers Multiplier of 1.75. Mostly, I reduced the gathers multiplier in order to fit my fabric.
In retrospect, I would consider a gathers multiplier of 1.5 for the bodice and 1.25 for the sleeve, especially for the fabric that I used. (You can also take a look at the inspiration photo to see that the gathers in the sleeve are more minimal.)
Fabric
For this project, I chose a double gauze in a light blue color. I love blue and I love double gauze so it seemed like the perfect choice. But ultimately, I think this fabric is a little too thick for this design. (I suppose it was a good test though!) Specifically, this is a “bubble gauze” from Joann Fabrics that I think it might have MORE than two layers of gauze. I’ve used it before and like it, but it’s a little weird for this design. The dress has a lot more body than I expected and stands away from my body quite a bit.
The thicker fabric also looks a little bulky with the shirring and gathers. It's not horrible but I would not necessarily recommend it. If you want to use a thicker, medium-weight fabric like this, I would reduce the gathers multiplier more than I did. (See note in drafting section.)
My first test of this pattern was with a rayon crepe and it handles much differently. Even with a high gathers multiplier it doesn't feel bulky or thick at the seams. It’s definitely something to consider when selecting fabric.
Final note on fabric, I used just 2 yards of 50” wide fabric. I folded the fabric just enough to cut out the bodice pieces. Then I cut the sleeves on the cross grain from the remaining length. I had enough left to cut two pockets. I used scrap fabric to cut the 3rd and 4th pocket pieces. It was JUST enough fabric and there are just a few scraps left over.
Elastic
I used three different kinds of elastic for this project. (Thank goodness for my robust stash!) For the casings around the neckline, I used 3/8" wide elastic. After some testing, I cut the sleeve elastic 11" long, which is 92% of the body measurement. I think this elastic could be a little tighter. I cut the bodice elastic 8.5" long, which is 77% of the body measurement.
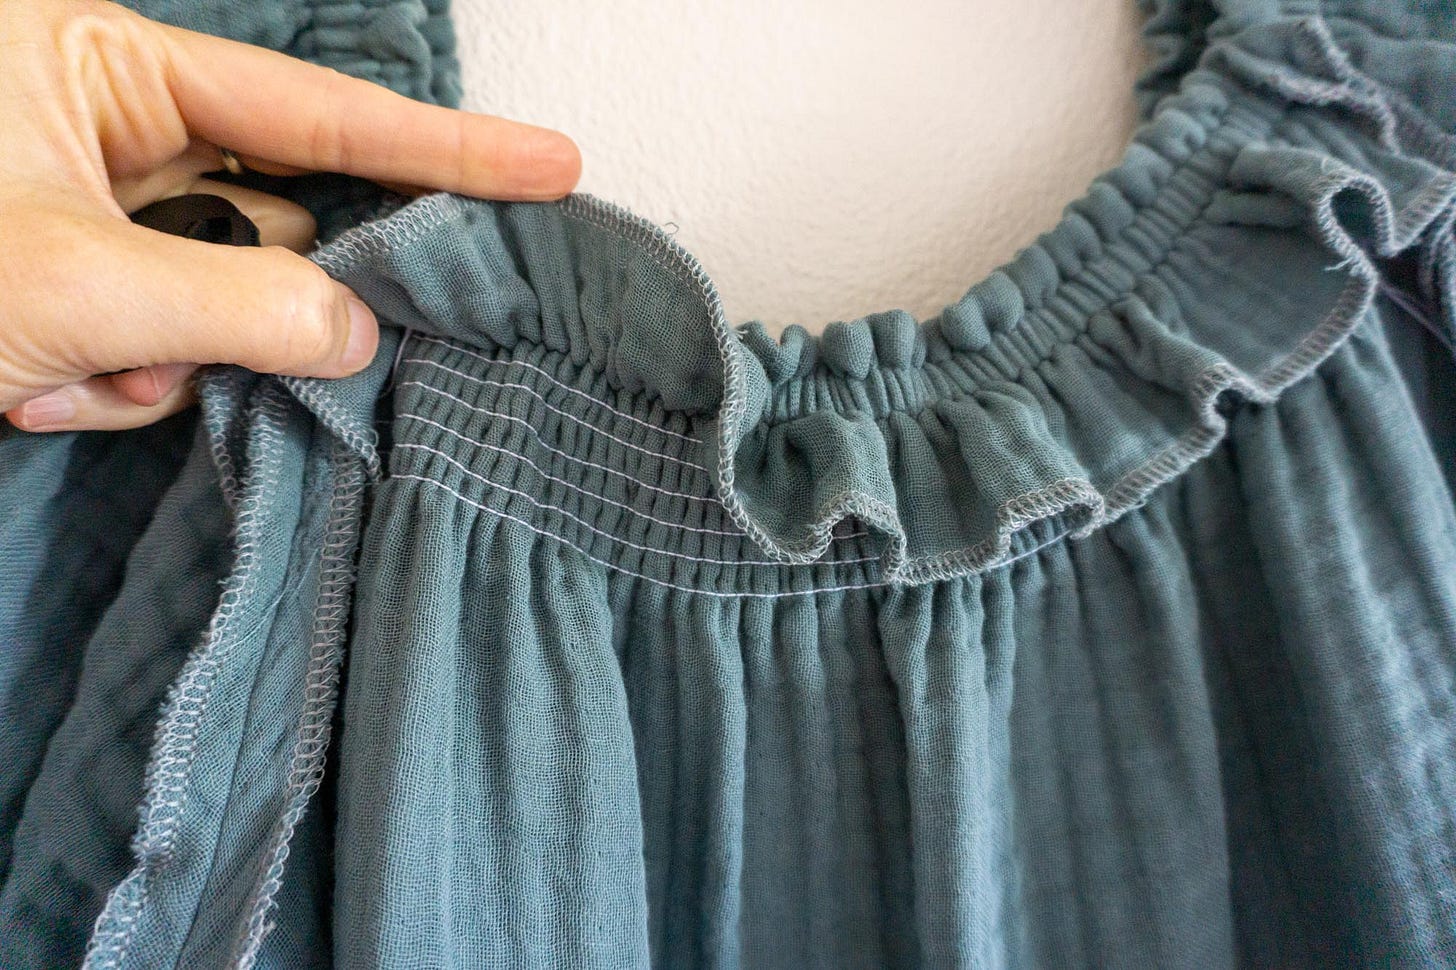
For the shirring, I used elastic thread. After stitching the shirring in the bodice, I had to reload my bobbin. I did not do a good job of stretching when winding that bobbin and the shirring did not shrink up as much as I wanted on the sleeves. I ended up pulling the elastic tighter by hand.
I also added a piece of elastic to the hem of the sleeve. I used the hem like a casing and inserted 1/8" wide elastic.
Construction
One of my main goals with the construction was to maintain the square corners of the neckline. So, instead of using one long loop of elastic through the casing, I used four separate pieces, one for each piece of fabric. Thus, the construction is less clean than I would normally like.
Ideally, for me, all of the elastic would be concealed inside the casing and covered by the facing. I even went to the mall and studied how dresses with shirred necklines were finished. To my surprise, the shirring was visible on the wrong side. And on one garment I saw, the shirring was even stitched through the facing. It also looked like the elastic shirring was stitched using a chain stitch. I'm really curious if a coverstitch machine could do this and want to do a little more research.
I also added in-seam pockets. I have a tutorial for sewing in-seam pockets on my other blog here.
How to Assemble the Shirred Dress
Staystitch armhole seams (Honestly, I didn't stay stitch but I wish I had!)
Finish curved edges of pockets
Using a slightly smaller seam allowance, stitch pockets to side seams. Press. (Understitching isn't a bad idea either. I forgot.)
Finish side seams and top edge of facing
Press facing to the wrong side.
Topstitch channels for elastic casing. I stitched rows at 1/2” and 15/16” from the edge. (I added 1/16” of ease for the elastic.)
Stitch rows of shirring. I spaced my shirring by 1/4". This is pretty tight and I wouldn't go any closer. Next time, I might do 1/16" wider, in between 1/4" and 1/8". Go slowly as you stitch the shirring, especially on the sleeve.
Insert elastic in sleeves and bodice. Baste down elastic edges and facing.
Finish edges of armhole seams and facings together.
Stitch sleeves to bodice front and back, flattening the fabric as you stitch.
Stitch side seams and pockets.
Stitch hems.
Optional: Add elastic to the sleeve hem.
If you’re new to using elastic thread, I shared some shirring tips on my other blog.
If you want to insert one long piece of elastic, I’d start by stitching the armhole seams. Then press the facing to the wrong side and stitch the casing.
I also wondered if it would work to piece together the 4 pieces of elastic with mitered/angled seams and then insert it into the casing. It would be tricky to get it in the right place and there would be extra bulk inside the casing from the seams. So that might not be a good solution.
Conclusion
This style of dress reminds me of a lot of the dresses that were popular back in the 90s—short sleeves, little ruffles and short hems. A lot of 90s dresses also had an empire waist. Sadly, I could never find an empire waist in the store that fit me at all. Alas! They just don't make dresses to fit my cup size. I was so glad when the empire waist went out of fashion.
I’ve been avoiding a lot of the returning 90s fashions but I was sucked in by this babydoll design. I'm not even quite sure why. I think it was partly the shirring and partly the confidence that I could recreate it myself. I’m really pleased that the drafting is fairly simple and the result looks really similar to the inspiration.
A babydoll style is probably not going to become a go-to style for me, but I really enjoyed drafting and sewing this dress. And. I'm really pleased with how it turned. Personally, I think I'll wear this dress as a pool coverup. The fabric is really soft and has a kind of towel feeling (is that bad lol?). I have a late fall trip planned to the desert that this will be perfect for.
I also think there's a lot that can be done with this design. Before we start our next project, I'm going to share some ideas on design variations for this draft. This last week, I looked through my collection of vintage clothing and found some dresses with similar style lines. And if I have time, I’m going to refashion my original muslin into a sleeveless version.
I hope that you’ve enjoyed this series. Please let me know in the comments if you have any questions. And, stay tuned for the next drafting project!
Happy mathing!
Beth
You can support this newsletter by subscribing, liking and sharing or check out the links below.
Visit me elsewhere on the web:
Pattern Shop | Improv Quilting E-Course | Instagram | YouTube


So beautiful, Beth!! It's the perfect re-creation of your inspiration!
Wow. Thank you for showing the pattern pieces. My sleeve pattern looked very different. Looking forward to sewing this dress next weekend!