Hello my mathy sewing friends! I hope that you had a fantastic weekend. It has been a beautiful fall here in Seattle, i.e. sunny and warm enough to shed the fleece for a few hours in the afternoon. I took advantage of the weather this weekend and got myself out to see the changing leaves. In the back of my head, I knew I should be writing this newsletter. But, if I know one thing about the PNW, it’s that you have to enjoy the good weather while it’s here!
The 10-day forecast has plenty of rain, so I will be able to devote myself to sewing without distraction. And I have a piece of sweater fabric that is destined to be a funnel neck pullover with a zip front closure just waiting to be cut and sewn.
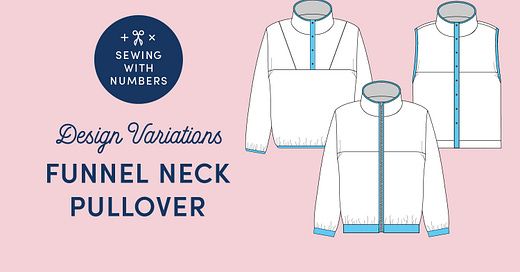
But first, I want to share a few ideas for variations to the Funnel Neck Pullover design. One of the best things about drafting your own patterns is that you can adjust and adapt the design to your own needs and desires.
In case you missed it, we designed this pattern in two posts. First we drafted the body and sleeves. And second we drafted the placket and collar and adjusted the front yoke to fit placket. Links below.
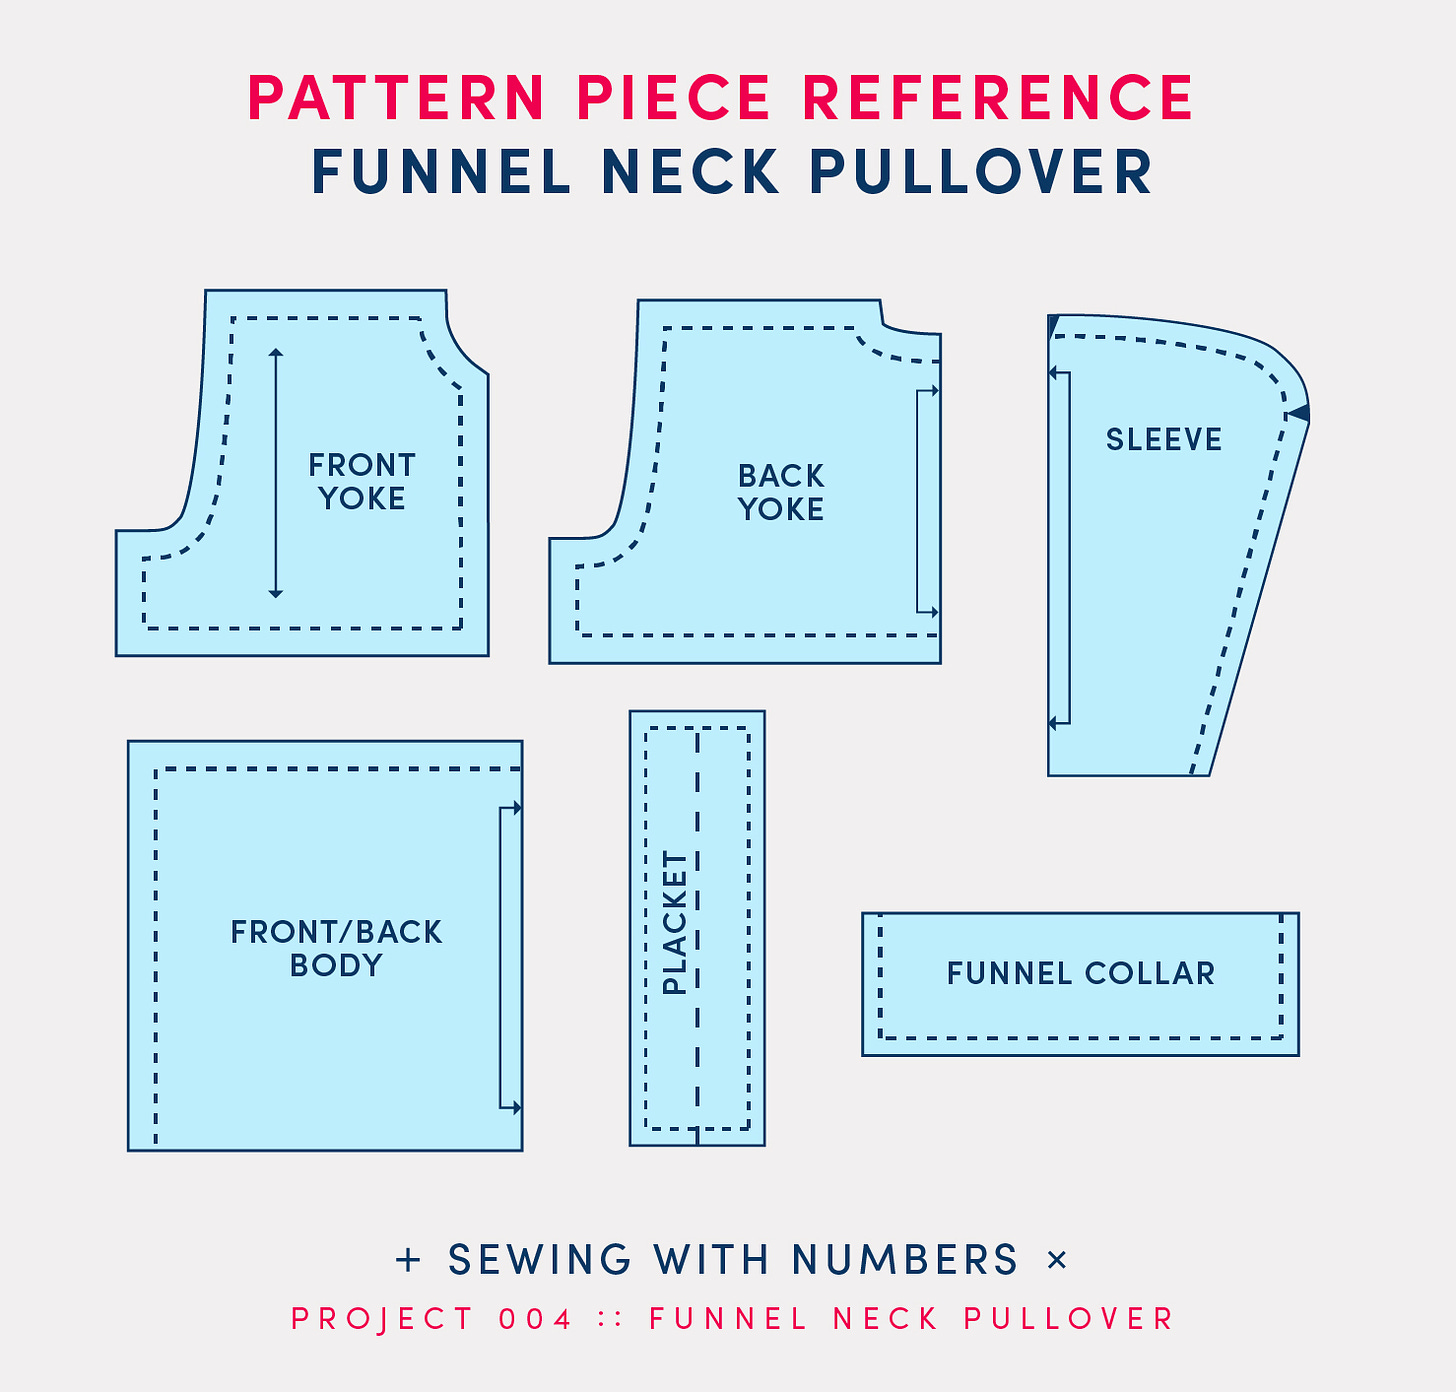
As a reminder, above are examples of the pattern pieces for the original pullover design. Just a note, these pattern pieces are not proportional. The seam allowance is a bit exaggerated just for the visuals. I love to be exact so this bugs me a little bit. But I just need you to know that I know it’s not exact. :P Let’s get on with it.
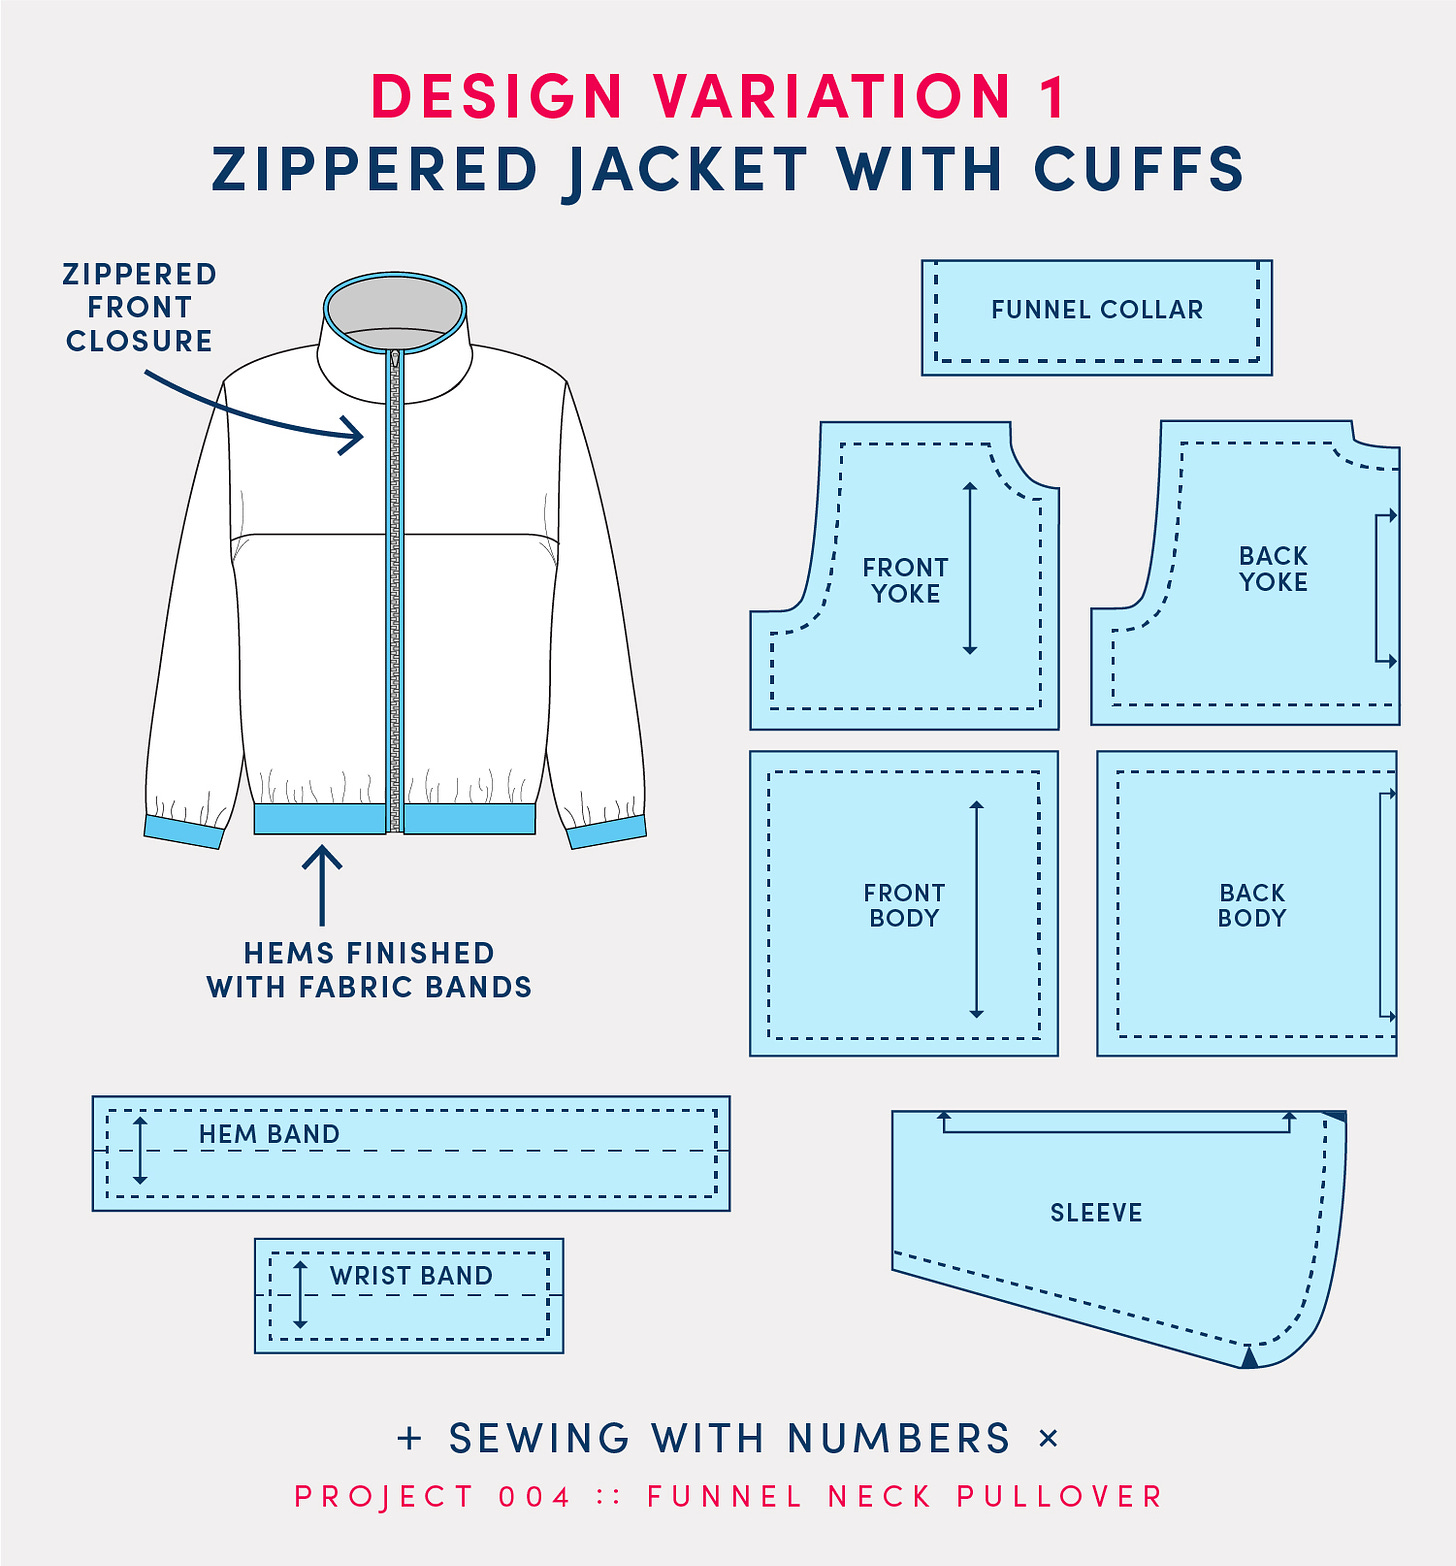
Design Variation 1 Zippered Jacket with Cuffs
My first Design Variation idea is a Zippered Jacket with Cuffs. For this design the front opens fully from the neck to the hem and is closed with a zipper. When you draft the body, you can cut for the yokes as we did for the pullover. But, you will want to make a separate pattern piece for the lower Front Body and add a seam allowance to the center front edge. Additionally, you do not need to cut away from the center front to allow for the snap placket.
Our original design was finished with a fold over stretch binding at the hem of the sleeve and body. Here, the hems are finished with a band. You can either use the same fabric as the body or something like a rib knit. You’ll want to shorten length of the sleeves and body the same amount as your finished band length and add a seam allowance to the hems. Similar to an elastic waistband, the bands are drafted with a fold along the horizontal line. If it’s a stretchy band, the width is usually 80%-90% of the finished width of the garment hem. But drafting a hem band is a whole post for another day.
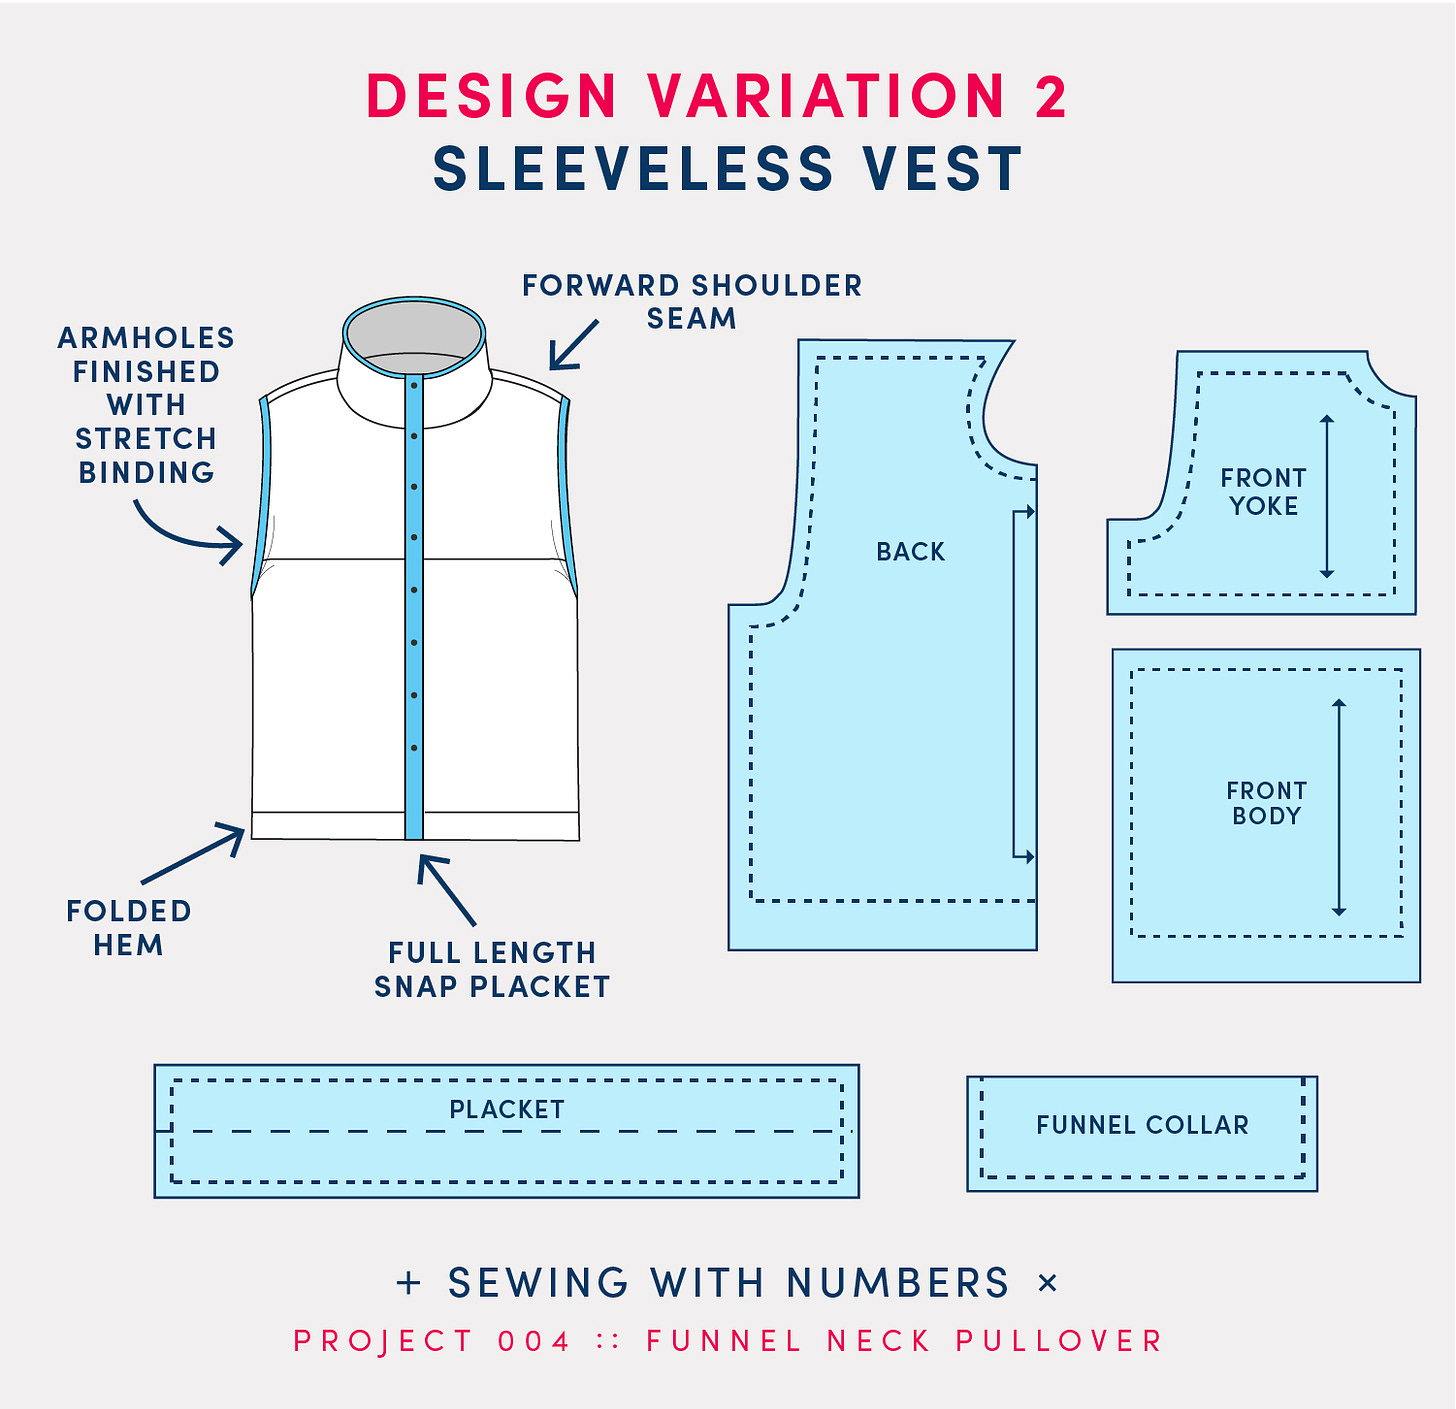
Design Variation 2 Sleeveless Vest
Who doesn’t love a vest for added warmth? For this variation, we are skipping the sleeves, and making a snap closure that goes from the neck to the hem. The hem is finished with a folded and top stitched edge and the armholes are finished with stretch binding. Just like in Variation 2, there will need to be a different Front Body pattern piece that is not cut on the fold. It’s optional but I also made the Back one piece, instead of having a separate yoke.
I also moved the shoulder seam forward so that it is visible on the front of the vest. To do this, you cut away the top part of the front yoke and reattach it the the back, matching the seam lines. Then you add the seam allowance back in. You can see in the illustration that at the top edge of the Back pattern piece, you start to see the curve of neckline as it wraps around the front.
The placket is made the same way as last week’s lesson, but it extends to the hem.
The next two variations use the concept of color blocking. We will add seam lines to our pattern pieces for visual interest. And if you use different colors of fabric, the seam lines will be enhanced even more. To add a seam line to a pattern piece, you will cut the pattern piece and then add seam allowance along the cut line.
If you want to learn more about color blocking, I have a video tutorial on my other blog that explains the concept and demonstrates a few examples. Click here to check it out.
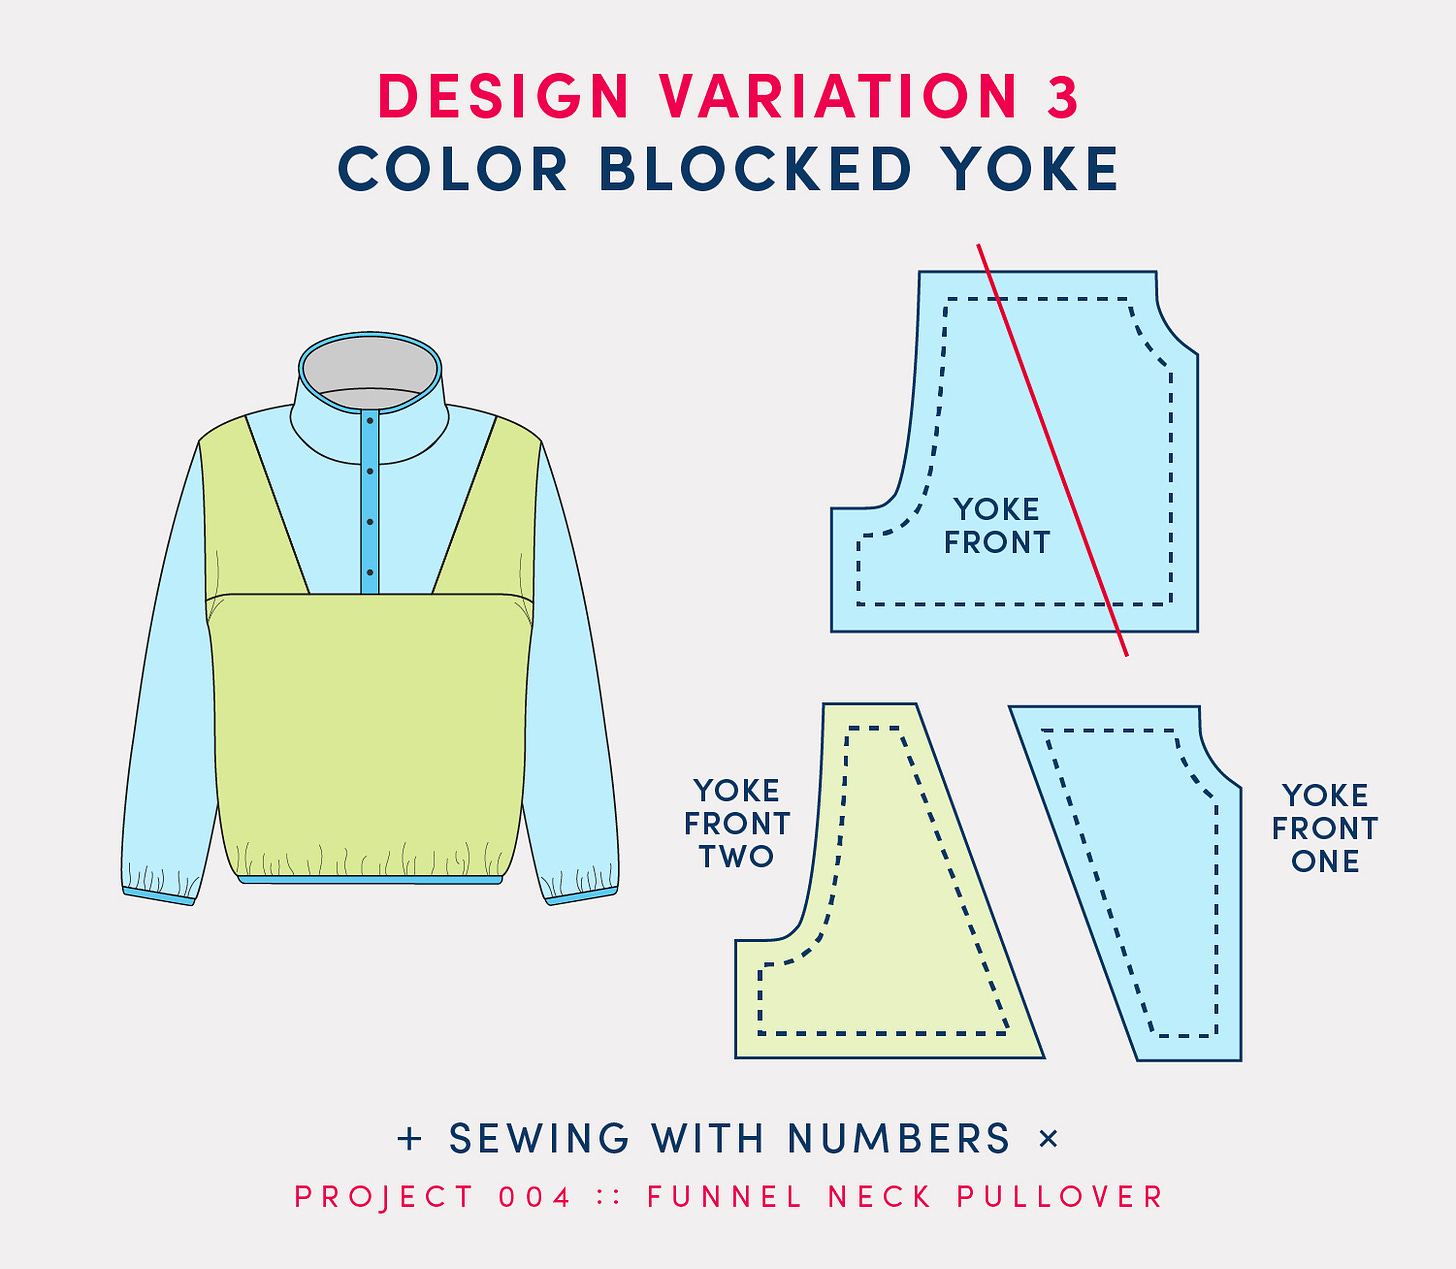
Design Variation 3 Color Blocked Yoke
For Design Variation 3, we are adding an angled seam line to the front yoke. You can mirror this on the back yoke as well, if you wish.
This variation is actually simpler than the previous two. All you do is draw the new seam line through the Yoke Front and cut along that line. Separate the two sides and add a seam allowance along the new seam line.
If you’re comfortable sewing it, you could remove the horizontal seam line by attaching Yoke Front Two to the Front Body. Just match the seam lines (not the seam allowance) and tape together.
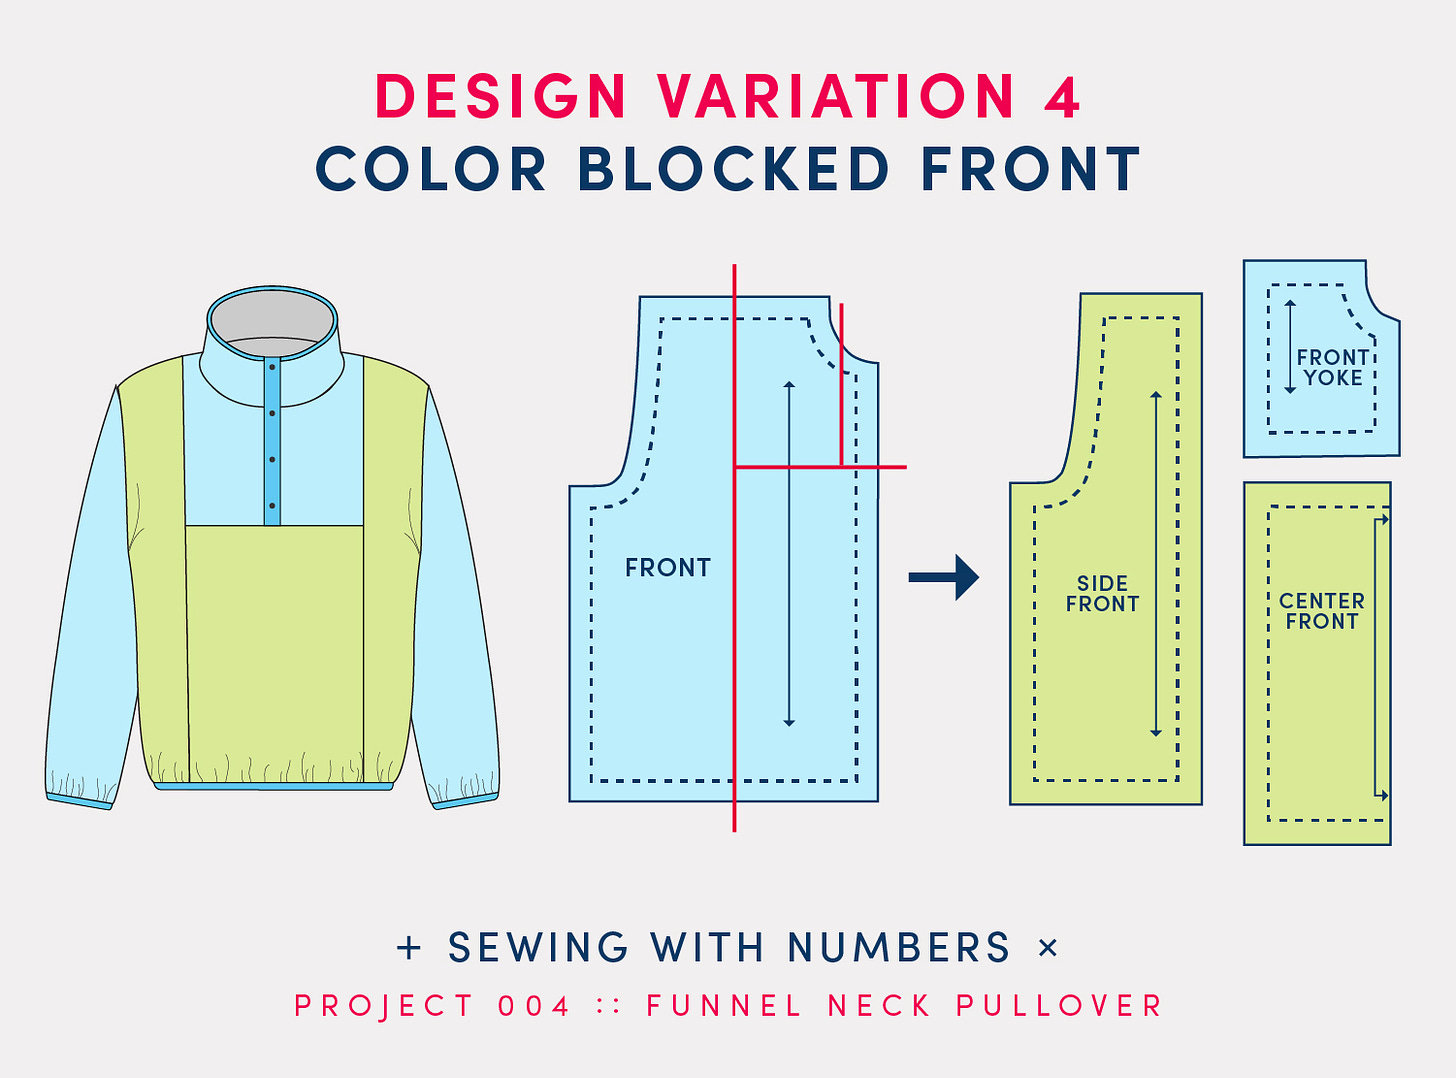
Design Variation 4 Color Blocked Front
For Design Variation 4, we’ve added a vertical seam line from the shoulder to the hem. There are a few different ways to approach the drafting for this variation.
In the illustration above, I’ve started with the Front Body Block, then cut the vertical line to divide the left and right sides. Next, I cut a horizontal line to create the Front Yoke and Center Front. And, finally, you’ll need to adjust the Front Yoke to accommodate the placket, as we did in the last lesson.
That’s it for today! I’m going to be working on my own variation of the pullover to share soon. Let me know in the comments if you have any questions. And if you enjoyed this post, you can tap the "heart" at the top or bottom to help other people find it.
Happy mathing!
Beth
You can support this newsletter by subscribing and sharing or check out the links below.
Visit me elsewhere on the web:
Pattern Shop | Improv Quilting E-Course | Instagram | YouTube



Thanks for these fabulous variations! I’ve drafted everything but the funnel neck and placket. I kept thinking about a jacket-style since you posted this. You made it easier for me. I’m searching my fabric stash for a suitable tester fabric (I don’t want to add to my overflowing stash). Thank you for sharing your amazing knowledge and ideas!!!